
Are your Anki Overdrive cars refusing to scan the track, leaving you stuck in the starting blocks? As a fellow car enthusiast and content creator at carcodepro.com, I understand the frustration when your high-tech toy hits a snag. If you’re experiencing issues with your Anki Overdrive car scanning the track, a faulty battery might be the culprit. While often overlooked, the battery’s health is crucial for these smart cars to function correctly, including their ability to read the track. In this guide, we’ll explore how replacing the battery in your Anki Overdrive car can potentially solve track scanning problems and breathe new life into your racing experience.
Many Anki Overdrive users face the common issue of cars not scanning the track. This problem can manifest in various ways: cars blinking incessantly, failing to recognize track pieces, or simply not responding at all. While software glitches or sensor issues can sometimes be responsible, a degraded battery is a frequent, yet fixable, cause. Over time, the LiPo batteries in these cars can lose their capacity, struggle to hold a charge, or even become damaged. A weak battery can lead to insufficient power for the car’s sensors and processors, hindering its ability to scan the track effectively.
Before assuming a complex technical malfunction, consider the simple solution: battery replacement. This process, while requiring a bit of DIY spirit, is surprisingly straightforward and can often resolve scanning issues and improve overall car performance. Plus, upgrading to a higher capacity battery can even extend your playtime.
This guide will walk you through replacing the battery in your Anki Overdrive car. Please note that while this repair can be effective, it may void your warranty. Proceed at your own risk and only if you are comfortable with basic electronics repair and soldering.
Taking Your Anki Overdrive Car Apart
The first step is to access the battery, which requires disassembling the car. Don’t worry, Anki Overdrive cars are designed with repairability in mind.
-
Locate the Hood Screw: Turn your Anki Overdrive car upside down. You’ll see three screws, but the largest one at the front is the key. This single screw secures the car’s hood.
-
Remove the Hood: Unscrew the front screw. Once removed, the hood should easily detach, revealing the internal components of your Anki Overdrive car.
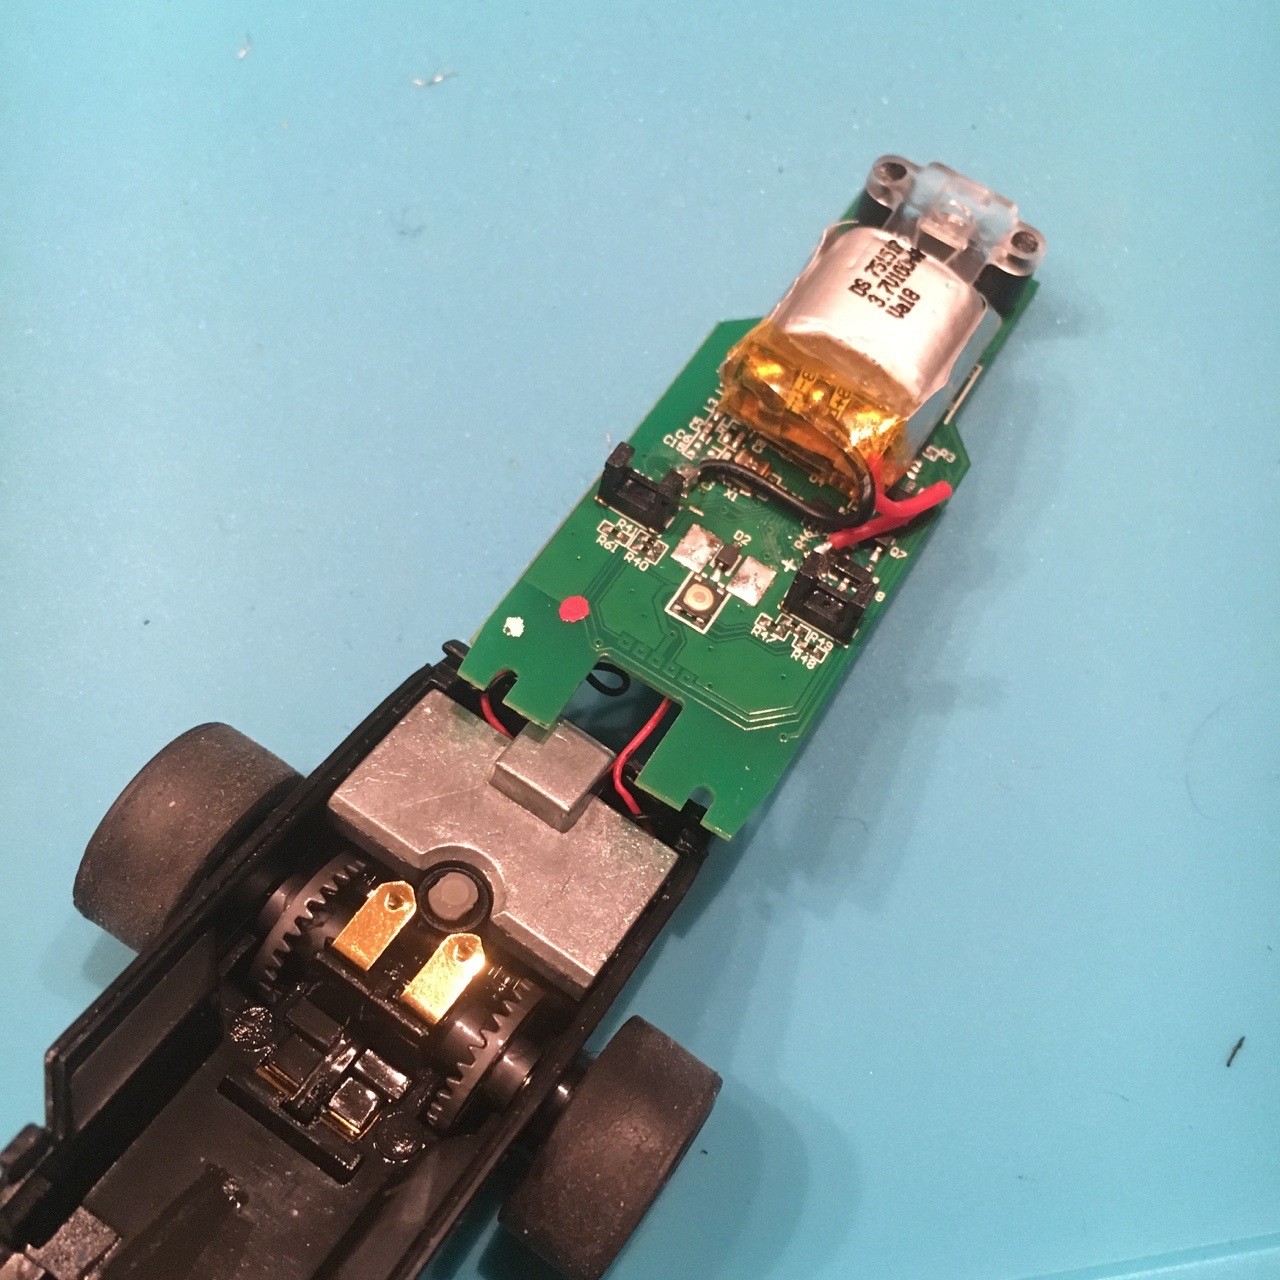
Alt text: Anki Overdrive car disassembled with the top hood removed, PCB and battery visible, laid on a workbench.
-
Detach the PCB: The Printed Circuit Board (PCB) is held in place by small latches on each side and hooks at the rear of the car. Gently release these latches. Carefully lift out the PCB, but be mindful of the wires connecting to the motors at the back. Avoid detaching the PCB completely as the motor wires remain connected.
-
Identify the Battery: With the PCB partially lifted, you can now clearly see the LiPo battery. You might also notice forked light barriers, which are part of the track scanning system. Inspect the battery for any signs of damage, such as swelling or bloating, which are indicators of a failing LiPo battery. A damaged battery could very well be the reason your Anki Overdrive car is not scanning the track.
Replacing the Battery: Revitalize Your Car’s Scanning Ability
Now for the core of the repair: replacing the old battery with a new one. This involves some basic soldering. If you’re new to soldering, consider watching a few beginner tutorials before proceeding.
-
Desolder the Old Battery: Heat up your soldering iron. Carefully unsolder the two wires (red and black) connecting the battery to the PCB. A desoldering pump or desoldering wick can help remove excess solder for a clean detachment.
-
Isolate Wires: To prevent accidental short circuits and potential damage to the car’s electronics, insulate the end of the first wire you desolder with tape. This is a crucial safety step.
-
Solder in the New Battery: Take your replacement battery and solder the wires to the same points on the PCB where the old battery was connected. Ensure correct polarity: red wire to the positive (+) pad and black wire to the negative (-) pad. Double-check before soldering to avoid damaging your car.
Alt text: Close-up view of a new LiPo battery successfully soldered onto the PCB of an Anki Overdrive car, wires neatly connected.
-
Secure the New Battery: Use the original double-sided tape or create a tape loop to secure the new battery in place on the PCB. Ensure the battery’s end is positioned near the optical sensor, as it was before.
Closing Up and Testing: Back on Track
With the new battery installed, it’s time to reassemble your Anki Overdrive car and test if the battery replacement has resolved the track scanning issue.
-
Reassemble the Car: Carefully slide the PCB back into the chassis, starting with the hinge at the back. Make sure the motor wires are correctly positioned in their slots. Gently push the PCB down until it clicks under the side latches. If your new battery is slightly larger, the PCB might not sit perfectly flush, but this is usually not a problem.
-
Replace the Hood: Position the hood back on the car and secure it with the single screw you removed earlier.
-
Test Track Scanning: Set up your Anki Overdrive track and try to run the car. If a faulty battery was the reason your Anki Overdrive car was not scanning the track, you should now see it working correctly. If the car still doesn’t scan, double-check that the light barriers are clean and properly aligned, and that no wires are obstructing them. Occasionally, reseating the PCB and ensuring all connections are solid can resolve minor issues.
Summary: Battery Replacement for Scan Issues and More
Replacing the battery in your Anki Overdrive car is a relatively simple repair that can solve track scanning problems and improve performance. If your car was struggling to scan tracks, exhibited poor battery life, or showed signs of battery degradation, this DIY fix is worth considering. You can often find replacement batteries online that even offer higher capacity than the original, extending your playtime and potentially resolving those frustrating “car not scanning track” moments.
Remember to exercise caution when working with electronics and soldering. If you’re unsure about any step, seek guidance from online resources or experienced hobbyists. With a little effort, you can revive your Anki Overdrive car and get back to enjoying the thrill of the race!
If you’ve attempted this battery replacement, share your experience in the comments below! Your insights can help other Anki Overdrive enthusiasts facing similar challenges.