
The check engine light – that little illuminated icon on your dashboard can cause a wave of anxiety for any car owner. It’s your car’s way of saying, “Hey, something’s not quite right!” But before you panic or rush to the mechanic, did you know you can get a preliminary diagnosis yourself, for free? Scanning your car for the check engine light is easier than you might think, and it’s the first step towards understanding and resolving the issue. This guide will walk you through how to use a simple OBD-II scanner to read those trouble codes and get a clearer picture of what your car is trying to tell you.
Understanding what triggers the check engine light is crucial. Modern vehicles are equipped with an On-Board Diagnostics system, specifically OBD-II in most cars manufactured after 1996. This system monitors various aspects of your car’s performance, from engine emissions to sensor readings. When the system detects a problem outside of the normal parameters, it illuminates the check engine light and stores a Diagnostic Trouble Code (DTC) in the car’s computer. This code is essentially a clue, pointing towards the system or component that is experiencing an issue.
Scanning your car allows you to retrieve these DTCs, giving you valuable information before you even visit a mechanic. While it’s not a magic fix, understanding these codes can empower you to make informed decisions about repairs, potentially saving you time and money. One of the easiest and most accessible ways to scan your car for free is by utilizing services offered at automotive parts stores like AutoZone. They provide a free Fix Finder service, allowing you to borrow an OBD-II scanner and get a preliminary diagnostic report. Let’s delve into the steps on how to scan your car for the check engine light using such a service.
Step-by-Step Guide to Scanning Your Car for Check Engine Light
This process outlines how to use a loaner OBD-II scan tool, commonly available at auto parts stores, to check your check engine light.
1. Preparation is Key
Before you begin, ensure your vehicle is safely parked and turned off. Engage the parking brake for added safety. Familiarize yourself with the location of your Data Link Connector (DLC). This is a standardized 16-pin port, usually located under the dashboard on the driver’s side. If you’re unsure, your vehicle’s owner’s manual can pinpoint its exact location. Having your vehicle information handy, such as year, make, and model, will also be beneficial later in the process.
2. Borrowing and Using the OBD-II Scan Tool
Visit your local AutoZone and request to borrow their Fix Finder scan tool (or equivalent OBD-II reader). The service is typically free of charge with a refundable deposit. An AutoZoner will assist you with the tool and explain the basic operation. Once you have the scanner, head back to your car.
3. Connecting the Scan Tool
Locate the DLC under your dashboard. Take the OBD-II scanner and carefully connect the cable connector to the DLC. The connector is designed to fit only one way, so you won’t need to force it. It should plug in smoothly and securely.
4. Scanning for Diagnostic Trouble Codes
With the scan tool connected, turn your car’s ignition to the “ON” position, but do not start the engine. This provides power to the car’s computer and the DLC. The scan tool will power on. Follow the instructions on the scan tool’s screen. Typically, you’ll need to select an option like “Read Codes” or similar. The scanner will then communicate with your vehicle’s computer to retrieve any stored DTCs. This process usually takes only a few seconds. The scan tool’s display will indicate when it’s reading and when it’s finished, often displaying “Reading Codes…” and then “Done.”
5. Retrieving Your Diagnostic Report
Once the scan is complete and the tool indicates “Done,” unplug the scanner from the DLC and turn your car’s ignition off. Return to the AutoZone store with the scan tool. Provide the AutoZoner with your vehicle information (year, make, model, and engine size if known). They will use their Z-Net terminal to retrieve the diagnostic report from the scan tool. The AutoZoner will then explain the error codes found, provide you with a printed report, and offer potential solutions or recommend further diagnostic steps.
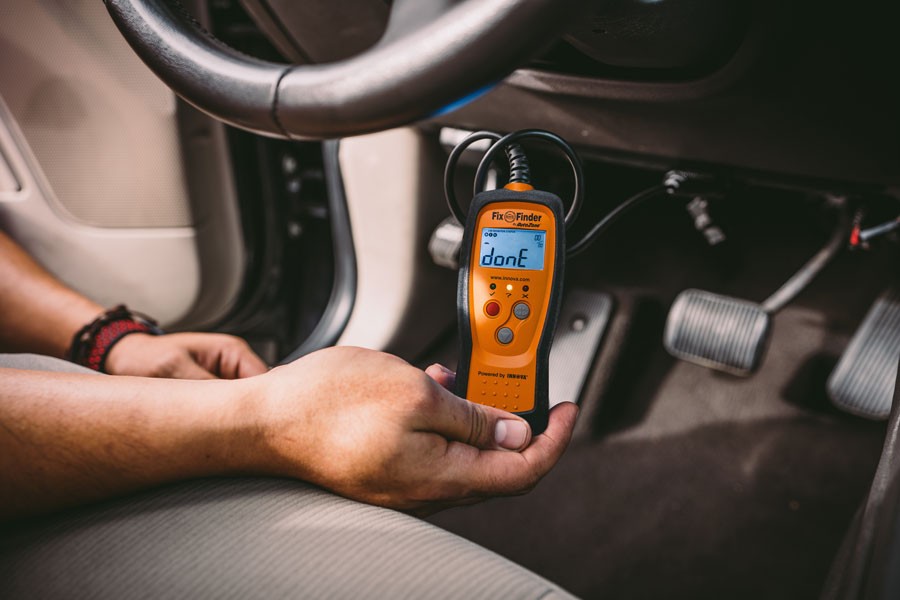 OBD-II scanner done reading trouble codesScanning car using OBD2 scanner
Troubleshooting Common Scan Tool Issues
While using an OBD-II scan tool is generally straightforward, you might encounter a few common issues. Here’s how to troubleshoot them:
- Blank LCD Screen on the Scan Tool: If the scan tool’s screen remains blank after connecting it to the DLC and turning the ignition ON, it indicates a lack of power at the DLC. This is often due to a blown fuse. Check your vehicle’s fuse box diagram (usually found in your owner’s manual or on the fuse box cover) and locate the fuse related to the diagnostic port or vehicle computer (PCM/ECM). Replace any blown fuses. If the problem persists after replacing the fuse, consult your vehicle’s repair manual or a qualified technician, as there might be a more complex electrical issue.
- “No Codes Found” Message: If the scan tool reports “No codes found,” but your check engine light is still on, there are a few possibilities. The issue might be intermittent, and the code might have cleared itself temporarily. It’s also possible that the problem is related to a manufacturer-specific system that the generic OBD-II scanner cannot access. In such cases, a dealership or a workshop with more advanced diagnostic equipment might be necessary.
- Connector Not Fitting the DLC: If you are unable to connect the scan tool to the DLC, it’s possible that your vehicle is older than the OBD-II standard (typically pre-1996). OBD-II became mandatory in the USA in 1996. Older vehicles might use a different diagnostic protocol or require a different type of scanner. Consult your vehicle’s owner’s manual or a mechanic to determine the appropriate diagnostic method for your older car.
Understanding Scan Tool Indicator Lights
Many OBD-II scan tools, including the Fix Finder, are equipped with indicator LEDs to provide a quick visual assessment of your vehicle’s system status. These lights are usually Green, Yellow, and Red and are located near the LCD screen.
- Green LED (checkmark icon): A green light indicates that all engine systems are currently operating within normal parameters. All emission monitors are active and have completed their self-tests without detecting any issues. No DTCs are present at this time.
- Yellow LED (question mark icon): A yellow light suggests that some of the vehicle’s monitors have not yet completed their diagnostic self-testing cycle, or there might be a “pending” DTC. A pending DTC means a potential issue has been detected, but it hasn’t occurred consistently enough to trigger a permanent DTC and illuminate the check engine light steadily (it might be flashing in some cases, or the light might be intermittent). Completing a full drive cycle (driving under various conditions – city, highway, stop-and-go) can allow all monitors to run and complete their tests. After a drive cycle, re-scan the vehicle to see if the yellow light clears or if it turns red.
- Red LED (X icon): A red light signifies that there is a problem with one or more of your vehicle’s systems. It also indicates that one or more DTCs are present and stored in the vehicle’s computer. When the red LED is illuminated, the check engine light on your dashboard will typically be steadily lit. This red indicator signals that it’s important to retrieve the diagnostic codes and investigate the underlying issue.
Deciphering Your Diagnostic Report and Next Steps
After scanning your car at AutoZone, the printed report and the AutoZoner’s explanation will provide you with a list of DTCs. Each code is a five-character alphanumeric code (e.g., P0171, C1234, B0001, U1000). The first character indicates the system (P=Powertrain, C=Chassis, B=Body, U=Network/Communication). The subsequent characters provide more specific information about the fault.
While the DTC itself gives you a starting point, it’s important to understand that it’s not always a pinpoint diagnosis. A DTC indicates a system or circuit where a problem has been detected, but further diagnosis might be needed to pinpoint the exact faulty component. For example, a code for a “lean fuel condition” (like P0171) could be caused by various issues, such as a vacuum leak, a faulty oxygen sensor, a problem with the fuel pump, or even a dirty mass airflow sensor.
The AutoZoner can provide you with common causes associated with the retrieved codes. They can also recommend potential parts that are frequently related to those codes. For simple issues like a loose gas cap (which can trigger EVAP system codes) or a faulty oxygen sensor, the solution might be straightforward. However, for more complex codes, further professional diagnosis by a qualified mechanic is often recommended. A mechanic can perform more in-depth tests, use specialized diagnostic equipment, and accurately pinpoint the root cause of the problem.
Scanning your car for the check engine light is a valuable first step in understanding your vehicle’s health. By utilizing free services like AutoZone’s Fix Finder, you can gain initial insights into potential issues and make informed decisions about maintenance and repairs. Remember, while a scan tool provides helpful clues, it’s often just the beginning of the diagnostic process, especially for more complex automotive problems.
FAQs
1. What should I do if the scan tool shows a red X?
If the scan tool displays a red X, it means that trouble codes are present and require attention. Take the scan tool back to AutoZone to have them download the diagnostic information and provide you with the error codes and possible explanations.
2. How do I know if my Data Link Connector (DLC) is functioning correctly?
To verify if your DLC is working, ensure that the scan tool powers on immediately when connected to the DLC and when the car’s ignition is turned to the “ON” position (engine off). If the scan tool powers up and attempts to communicate with the vehicle, the DLC is likely functioning properly. If there’s no power to the scan tool, check the related fuses as mentioned earlier.
3. Can I use the Fix Finder scan tool with other diagnostic devices or software?
No, the Fix Finder scan tool from AutoZone is designed as a standalone tool for quick, basic diagnostics and is specifically intended to be used with AutoZone’s Z-Net terminals for report retrieval. It is not designed to be compatible with other diagnostic devices or software.
4. How do I return the scan tool to AutoZone after use?
To return the scan tool, simply bring it back to the AutoZone store from which you borrowed it. Typically, you’ll need to return it on the same day. Adhere to AutoZone’s return policy guidelines and ensure you get your deposit back.
5. What if I can’t locate the DLC in my car or don’t have a repair manual?
If you are having trouble finding the DLC, it’s typically located under the driver’s side dashboard, often near the steering column. You can also consult your vehicle’s owner’s manual for the precise location. Another helpful resource is online search – searching for “[your car year, make, model] DLC location” will often yield helpful diagrams or videos. If you still can’t find it or need more in-depth repair information, consider a single-vehicle subscription to online repair information databases like ALLDATAdiy or similar services, which provide detailed repair manuals and diagrams for your specific vehicle.
[
How to Replace a Coolant Temperature Sensor in Your Car
Don’t let a bad coolant temperature sensor cause overheating! Discover the signs of failure, the tools you need, and a step-by-step replacement guide to fix it fast.
Read More
](https://www.autozone.com/diy/sensors/how-to-replace-a-coolant-temperature-sensor-in-your-car)
[
Signs of a Bad Oxygen Sensor
Is your car running rough or failing emissions? Learn how to recognize the common symptoms of a bad oxygen sensor, its effects on your vehicle, and how to fix the issue.
Read More
](https://www.autozone.com/diy/electrical/bad-o2-sensor-symptoms)
[
How to read your check engine light with Fix Finder
Check engine light on? You can use AutoZone’s Free Fix Finder Service to get a free code reading and vehicle health report.
Read More
](https://www.autozone.com/diy/how-to/how-read-your-own-check-engine-light-with-our-free-fix-finder-service)