The Epson L220 is a versatile all-in-one inkjet printer, known for its efficiency in printing, copying, and scanning. Released in 2015, this model comes with a Continuous Ink Supply System (CISS) and improved printing speeds compared to its predecessors. Beyond printing, the Epson L220 also functions effectively as a scanner for documents, images, and photographs. This guide focuses on utilizing the Epson L220 scanner to digitize multiple documents and combine them into a single PDF file, streamlining your workflow and document management.
There are several methods to scan documents using the Epson L220. While you can use third-party software like CorelDraw, ArcSoft PhotoStudio, Abbyy FineReader, or Adobe Photoshop, this article will specifically guide you through using Epson’s dedicated software, EPSON Scan. This software is bundled with the printer drivers and offers a straightforward approach to scanning and managing your documents.
To effectively scan multiple documents into a single PDF using your Epson L220 printer and the Epson Scan software, follow these preparatory and scanning steps:
Preparation Steps for Scanning with Epson L220
Before you begin the scanning process, ensure you have completed the following preparations:
- Install Epson L220 Drivers: Ensure that you have installed all necessary drivers for your Epson L220 printer. This includes both the printer and scanner drivers. Typically, these drivers are available on the CD-ROM that came with your printer or can be downloaded from the official Epson support website.
- Computer or Laptop Ready: Have your computer or laptop ready and powered on. This device will serve as the processing and storage unit for your scanned documents.
- USB Connection: Establish a stable connection between your Epson L220 printer and your computer using a USB cable. Make sure the printer is powered on.
- Documents Ready for Scanning: Prepare the stack of documents, photos, or images that you intend to scan. Arrange them in the order you want them to appear in your final PDF document.
Scanning Documents into a Single PDF on Epson L220 using EPSON Scan
Once you have completed the preliminary steps, proceed with the following instructions to scan your documents and save them as a single PDF file:
-
Place Your Document on the Scanner: Open the scanner unit cover of your Epson L220 printer. Carefully place your first document face-down on the scanner glass, aligning it with the corner markers.
-
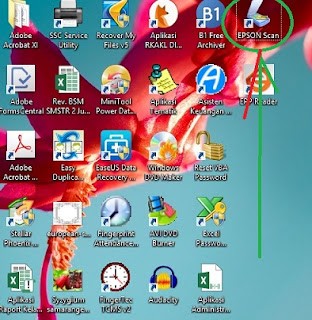
Launch EPSON Scan Software: Access the EPSON Scan application on your computer. You can usually find it in your Start Menu under “Epson” or on your desktop if a shortcut was created during installation.
- Select Professional Mode: In the EPSON Scan interface, if you are not already in it, switch to Professional Mode. This mode provides more control over scanning settings, preview options, and output configurations, which is essential for creating a multi-page PDF.
-
Preview Your Scan: Click the Preview button. This will perform a quick pre-scan of your document, allowing you to see how it will appear and make any necessary adjustments before the final scan.
-
Adjust Scan Area (If Needed): After the preview scan, you can manually adjust the selection area to precisely crop the document edges. Drag the selection borders in the preview window to define the exact area you want to scan.
-
Configure Settings: Click the Configuration button to open the settings window. Here, you can customize various scan parameters such as document type, image type (color, grayscale, black & white), resolution (DPI), and most importantly, the Document Size. Ensure you select the correct document size to match your paper (e.g., A4, Letter).
-
Initiate the Scan: Once you are satisfied with the preview and settings, click the Scan button. EPSON Scan will begin scanning your first document.
-
Document Capture and Saving: After scanning the first page, EPSON Scan will prompt you for further actions. To scan multiple documents into one PDF, do not close EPSON Scan after the first scan. Instead, remove the scanned document from the scanner bed and place the next document you wish to scan.
-
Repeat Scanning Process: Click the Scan button again for each subsequent document you want to add to the PDF. EPSON Scan will append each scanned page to the same document.
-
Finalize and Save as PDF: Once you have scanned all your documents, look for the Save File or similar option in the EPSON Scan software. In the save settings, choose PDF as the file format. You can also specify the file name and destination folder where you want to save your combined PDF document.
- Complete the Process: Click OK or Save in the save settings window. EPSON Scan will then finalize the process, combining all scanned pages into a single PDF file and saving it to your specified location.
After the process is complete, the folder containing your newly created PDF document will automatically open, allowing you to access and verify your multi-page PDF file. Scanning multiple documents into a single PDF with the Epson L220 and EPSON Scan software is a straightforward process that can significantly enhance your document management efficiency.

