In today’s digital design workflow, scanners play a crucial role in digitizing hard copy images and documents. Whether you’re working with photos, sketches, or important paperwork, a scanner is essential for bringing physical media into your computer.
A scanner is an input device that captures images from physical objects and converts them into a digital format, much like a photocopy machine for the digital age.
Read also: By using Adobe Photoshop for scanning, you can immediately edit your digitized documents or photos, streamlining your design process and enhancing efficiency. Let’s explore How to Easily Scan Images with Photoshop.
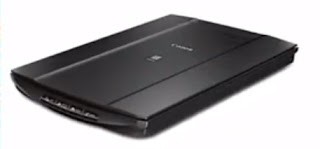
This tutorial will guide you through the simple steps of scanning directly into Photoshop, allowing for immediate editing. For this demonstration, we’re using a Canon LiDE 110 scanner.
Alt text: Connecting a Canon LiDE 110 scanner to a computer for image scanning.
Download Canon LiDE 110 Driver
Step 1: Ensure your scanner and computer are powered on and properly connected. Prepare the image or document you wish to scan, place it on the scanner bed, and close the scanner lid.
|
||
| Connect Scanner to Computer |
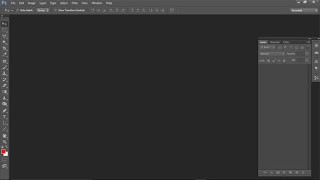
Step 2: Launch the Adobe Photoshop application on your computer.
| Opening Photoshop for scanner import |
Read also: Easy Guide to Scan Images with CorelDRAW
Step 3: In this step, we will select and activate the scanner that is connected to your computer within Photoshop.
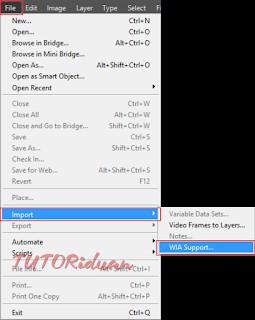
Navigate to the File > Import > menu and select WIA Support… option. This will initiate the scanner connection through Windows Image Acquisition (WIA).
| Activating scanner import via Photoshop’s File menu |
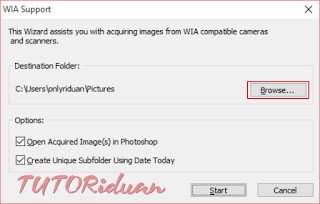
A window will then appear, prompting you to specify where the digital file will be saved temporarily. Click the Browse button to choose your desired folder on your computer.
| Selecting a destination folder for scanned files |
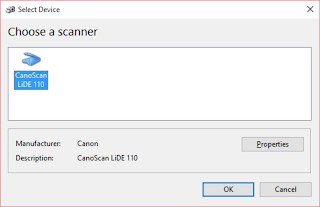
Next, click Start. A “Select Device” window will pop up, allowing you to choose the specific scanner you intend to use if multiple scanners are connected. Select your scanner and click OK.
| Choosing the correct scanner from the device list |
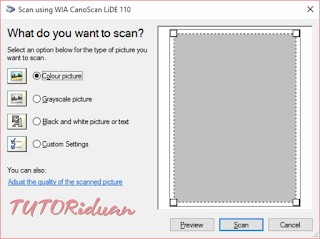
Step 4: Once you’ve selected your scanner, the scanner interface window will appear within Photoshop.
| Photoshop scanner dialog box for image acquisition |
Note: Configure your desired scan settings such as color mode (Color, Grayscale, or Black and White) and resolution.
Click the Preview button to pre-scan your document and adjust the selection area if needed. This allows you to crop the scan before the final capture.
Finally, click the Scan button to initiate the document scanning process into Photoshop.
|
||
| Scanning in Progress |
Read also: Color Combination Tips for More Appealing Designs
Step 5:
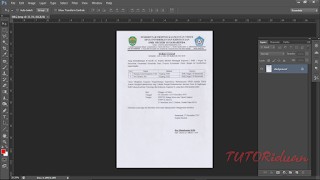
At this stage, you can perform any necessary edits to your scanned image directly within Photoshop. This might include adjustments, retouching, or cropping. Once you are satisfied with your edits, proceed to save your scanned image in your preferred digital file format.
| Photoshop interface showing the scanned and editable image |
Saving Your Scanned Image
When you click the Scan button, Photoshop automatically creates a folder and saves the scanned file in .BMP format within the folder you specified in Step 3.
Saving Again in a Different Format
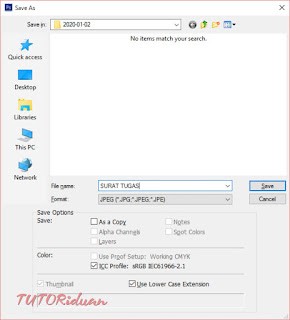
To save your scanned image in a different file format (such as JPG, PNG, or TIFF), you need to perform a “Save As” operation.
Go to File > Save As.
| Accessing the Save As dialog in Photoshop |
Congratulations! You’ve successfully scanned an image into Photoshop CC 2015.
Still Confused? Watch the Video Tutorial Below for a Practical Demonstration:
[Insert Video Tutorial Here – In a real scenario, you would embed the video here]
How to Scan Images with Photoshop in Detail:
[Insert Embedded Video Player Here – Placeholder for video embed code]
Read also: That concludes our easy guide on How to Scan Images with Photoshop. We hope this tutorial has been helpful. Keep up the spirit and best of luck to YOU!
