
Experiencing issues with your Anki Overdrive car refusing to scan the track? It’s a common frustration for enthusiasts of this interactive racing system. While there could be several reasons why your Anki Overdrive car is not scanning, one often overlooked culprit is the car’s battery. Like any rechargeable battery, the LiPo batteries in Anki Overdrive cars degrade over time, potentially leading to performance issues, including the dreaded “won’t scan” problem.
This guide will walk you through replacing the battery in your Anki Overdrive car. While this process might seem daunting, it’s a manageable DIY task for those comfortable with basic electronics and soldering. However, be warned: opening your Anki Overdrive car will likely void your warranty. Proceed at your own risk and only if you are comfortable with DIY electronics repair.
This article is inspired by the experience of upgrading an Anki Overdrive car with a higher capacity battery, which not only extends playtime but can also breathe new life into cars exhibiting performance issues possibly related to battery health. Sometimes, a car that “won’t scan” is simply suffering from an old, worn-out battery struggling to power the car’s systems adequately.
Before diving in, it’s worth noting that iFixit’s teardown of older Anki Drive cars gave the system a repairability score of 8/10. This suggests that with care, Anki Overdrive cars are designed to be somewhat repairable, making battery replacement a viable option.
The result of a battery replacement can be significant. Imagine your Anki Overdrive car not only working again but also boasting extended battery life thanks to a higher capacity replacement! Let’s explore how to achieve this.
Choosing the Right Battery
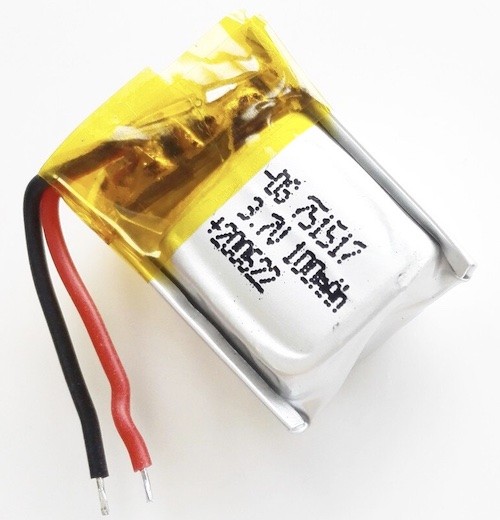
Replacement battery: Consider a battery like this replacement battery from ThingPulse. Using a coupon like SQUIX-ANKI might get you a discount and supports content like this. When choosing a replacement, ensure it’s compatible with Anki Overdrive cars and consider a slightly higher capacity (like 100mAh compared to the original 70mAh) for improved run time.
Step-by-Step: Taking Your Anki Overdrive Car Apart
The initial disassembly is surprisingly straightforward. Flip your Anki Overdrive car over, and you’ll see three screws on the underside. However, only the largest screw located at the front of the car is the key to accessing the internals.
-
Remove the Hood: Unscrew the front screw. Once removed, the car’s hood should easily detach.
-
Detach the PCB (Printed Circuit Board): With the hood off, you’ll see the PCB. It’s secured by small latches on each side and hooks at the rear. Gently release these latches to free the PCB. Important: Be careful not to disconnect the delicate wires at the back that connect to the motors. There’s no need to fully remove the PCB from the black plastic base; we just need enough access to the battery. The motors will remain connected during the battery replacement.
-
Locate the Battery: Once the PCB is partially lifted, you’ll clearly see the LiPo battery pack. You’ll also notice the forked light barriers, crucial components for measuring motor speed and track scanning. In some cases, like the original author’s, a swollen or “bloated” battery is a clear sign of degradation and the need for replacement. A failing battery can be a hidden reason why your Anki Overdrive car won’t scan reliably.
Replacing the Old Battery with a New One
Now for the delicate part – battery replacement. Soldering skills are required for this step.
-
Desolder the Old Battery: Heat up your soldering iron. Carefully unsolder the two wires (red and black) connecting the old battery to the PCB. Using desoldering braid or a desoldering pump can help remove excess solder and make the process cleaner.
-
Prevent Short Circuits: To avoid accidental short circuits that could damage the car’s electronics, insulate the exposed wire ends immediately after desoldering. Wrapping tape around the wire ends is a simple and effective method.
-
Solder in the New Battery: Solder the new battery’s wires to the same points on the PCB, ensuring correct polarity (red to positive, black to negative). Again, be mindful of preventing short circuits during this process. Use tape or a “third hand” tool to hold wires in place if needed. Remember, even partially charged batteries can cause shorts.
Reassembling Your Anki Overdrive Car
With the new battery soldered in, it’s time to put everything back together.
-
Secure the Battery: Use the original double-sided tape (if it’s still sticky) or create a “tape loop” with new tape to secure the new battery to the PCB. This helps with reassembly. Ensure the battery’s end is positioned near the optical sensor; this proximity might be important for proper function, although not explicitly stated, it’s good practice to replicate the original arrangement.
-
Reinstall the PCB: Carefully slide the PCB back into the chassis. First, align the hinge at the back of the car and ensure the motor wires are correctly positioned in their slots. Then, gently push the PCB down, engaging the side latches. If your new battery is slightly larger, the PCB might not sit perfectly flush, but this is usually not problematic.
-
Reattach the Hood: Replace the hood and secure it with the screw you removed earlier.
Testing and Troubleshooting
Time for the moment of truth! Set up your Anki Overdrive track and test your car.
Initially, after reassembly, the test car worked perfectly. However, after disassembling it again for documentation, the car initially seemed unable to scan the track. This highlights a potential issue:
- Light Barrier Alignment: If your car isn’t scanning after battery replacement, double-check the forked light barriers. They might be misaligned or obstructed. Reopening the car and ensuring they are correctly positioned is crucial. Wires obstructing the light path can also cause scanning problems.
After ensuring everything was correctly positioned, the car worked flawlessly again.
To test the battery upgrade’s impact, try “Battle” mode, where cars run until one wins or batteries deplete. The upgraded car, in the original test, ran significantly longer than a stock car before any low battery warnings, indicating the success of the higher capacity battery and the repair.
Conclusion: Battery Replacement as a Potential Fix for Scanning Issues
This battery replacement operation can be a successful way to revive a potentially failing Anki Overdrive car, especially one that “won’t scan.” For a small cost (around USD $3 for the battery versus USD $50+ for a new car), you can significantly extend your car’s life and potentially resolve scanning problems linked to battery health.
However, remember the warnings: This is a DIY repair that voids your warranty and requires soldering skills. It’s recommended only if your car is already out of warranty or malfunctioning, and you are comfortable with electronics repair.
Share your experiences in the comments below if you attempt this battery replacement! Your feedback can help other Anki Overdrive enthusiasts decide if this repair is right for them and potentially troubleshoot similar “won’t scan” issues.