
The Epson L220 printer, released in 2015 by Epson, is a popular choice for home and office users. Known for its improved printing speed over previous models and integrated Continuous Ink Supply System (CISS), the Epson L220 is also a versatile multifunction device. Beyond printing, it offers convenient scanning capabilities for documents, images, photos, and more.
This guide will walk you through the process of scanning documents using your Epson L220 printer. We will focus on using the Epson Scan software, which is the dedicated software provided by Epson for optimal scanning performance.
While there are alternative methods to scan, such as using software like CorelDraw, ArcSoft Photostudio, Abbyy FineReader, or Adobe Photoshop, this article will concentrate on the most direct and efficient method: utilizing the Epson Scan software that comes with your Epson L220 printer.
To begin scanning documents with your Epson L220 printer using the Epson Scan software from your driver CD, follow these preparation and scanning steps:
Preparation Before Scanning
Before you start scanning, ensure you have the following in place:
- Install Epson L220 Drivers: Make sure you have installed all the necessary drivers for your Epson L220. This includes both the printer driver and, crucially, the scanner driver. This step is mandatory for your computer to communicate properly with the scanner function.
- Computer or Laptop Ready: Have your computer or laptop turned on and ready to save the scanned files.
- USB Connection: Connect your Epson L220 printer to your computer using a USB cable. Ensure the connection is stable throughout the scanning process.
- Document Preparation: Prepare the documents, photos, or images you intend to scan. Remove any staples, paper clips, or anything that could obstruct the scanning process or damage the scanner glass.
Step-by-Step Guide to Scanning with Epson L220
Once you have completed the preparation steps, you are ready to begin scanning your documents:
-
Place Your Document on the Scanner: Open the scanner cover of your Epson L220 printer. Carefully place your document face-down on the scanner glass, aligning it with the indicated corner or guides. Close the scanner cover.
-
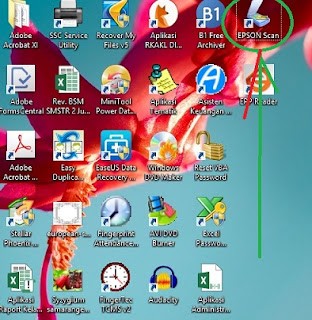
Launch Epson Scan Software: Open the Epson Scan application on your computer. You can usually find it in your Start Menu (Windows) or Applications folder (Mac), or sometimes as a desktop icon if you chose to create one during installation.
- Select Professional Mode: When Epson Scan opens, it typically defaults to Home Mode. For more control over your scan settings and output, switch to Professional Mode. This mode provides advanced options for previewing, adjusting settings, and customizing your scan.
-
Preview Your Document: In Professional Mode, click the Preview button. This will initiate a pre-scan, allowing you to see how your document is positioned and how the scan area will be captured.
-
Select Scan Area (Optional): After the preview, you can manually adjust the scan area by dragging and resizing the selection box around the document in the preview window. This is useful if you only need to scan a portion of the document or want to exclude any borders or unwanted areas.
-
Configure Scan Settings: Click the Configuration button to access detailed scan settings. Here, you can customize various parameters such as:
- Document Type: Specify whether you are scanning documents, photos, or film.
- Image Type: Choose the color mode (Color, Grayscale, Black & White).
- Resolution (DPI): Select the desired resolution. Higher DPI results in better image quality but larger file sizes. 300 DPI is generally suitable for documents and photos, while 600 DPI or higher might be preferred for high-quality image scanning or OCR (Optical Character Recognition).
- Orientation: Choose between Portrait or Landscape orientation.
- Other Adjustments: Depending on your needs, you might also find options for image correction, color adjustments, and more within the configuration settings.
-
Initiate the Scan: Once you are satisfied with your preview and settings, click the Scan button. Epson Scan will begin the scanning process.
-
Save Your Scanned Document: After scanning is complete, a window will appear allowing you to specify the save location, file name, and file format for your scanned document.
- File Format: Choose your desired file format. Common options include:
- JPEG (.jpg): Suitable for photos and images, offering good compression and smaller file sizes.
- PDF (.pdf): Ideal for documents, preserving formatting and allowing for text searchability (especially if OCR is enabled).
- TIFF (.tif): A lossless format that retains maximum image quality, suitable for archiving or professional use, but results in larger file sizes.
- File Name: Give your scanned file a descriptive name.
- Save Location: Choose a folder on your computer where you want to save the scanned file.
- File Format: Choose your desired file format. Common options include:
- Complete the Process: After configuring the save settings, click OK. Epson Scan will save your scanned document to the specified location. Often, the software will automatically open the folder where your scanned file is saved, allowing you to access your newly scanned document immediately.
By following these steps, you can effectively scan documents, photos, and more using your Epson L220 printer and the Epson Scan software. Experiment with the different settings in Professional Mode to optimize your scans for various purposes and achieve the best possible results.