
Experiencing error code 2000:0146 on your Dell laptop? This error often points to potential issues with your hard drive, and it’s crucial to diagnose the problem accurately. A ‘Custom Test’ on your laptop’s hard drive is an advanced diagnostic procedure that can provide more reliable results. This guide will walk you through the process of launching and running a hard drive custom test on your Dell laptop to identify potential errors.
To begin, follow these steps to access the Dell Diagnostics:
- Power Down: Ensure your laptop is completely powered off. It’s advisable to keep the AC adapter plugged in during the diagnostic process.
- Power On and Tap: Turn on your laptop and immediately begin repeatedly tapping the F12 key.
- Select Diagnostics: From the boot menu that appears, use your arrow keys to navigate and select the ‘Diagnostics’ option. Press Enter to proceed.
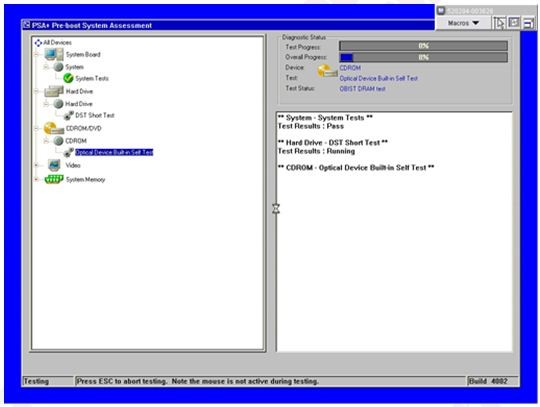
You will now enter the Dell PSA+ Diagnostics environment. The following screens illustrate the typical progression of this diagnostic startup:
If you see color bars appear on the screen, it indicates the diagnostic process is initializing correctly.
If the 2000:0146 error reappears at this stage, don’t worry. Simply ignore the message and continue with the diagnostic testing process.
The system will then attempt to launch the 32-bit Diagnostics program. Dell systems typically include a hidden partition on the hard drive containing these diagnostic tools. If this partition is accessible, the diagnostics will load from there.
However, if the hidden partition is not found, you will be prompted to use the Resource DVD.
If you are prompted to insert the Resource DVD, follow these steps:
- Insert the DVD: Place the Dell Resource DVD into your laptop’s optical drive.
- Restart: Shut down your laptop and restart it.
- Boot from DVD: As the Dell logo appears during startup, immediately and repeatedly tap the F12 key again to access the boot menu.
- Select CD/DVD/CD-RW: In the boot device list, highlight the option that corresponds to your CD/DVD/CD-RW drive and press Enter.
- Boot from CD-ROM: Select ‘Boot from CD-ROM’ from the subsequent menu and press Enter.
- Press Any Key: You will see a message: ‘Press any key to boot from the CD’. Press any key promptly.
If you successfully boot from the DVD, the Dell Diagnostics main menu will appear.
Now that you have accessed the Dell Diagnostics, you can proceed to run the Custom Test on your hard drive:
- Access Custom Test: From the Dell Diagnostics main menu, navigate and select the ‘Custom Test’ option.
- Select Hard Drive: Click on the ‘+’ sign next to ‘Hard Drive’ to expand the options. Then, highlight ‘SATA Disk’.
- Non-Interactive Test: Place a checkmark in the box labeled ‘Non-Interactive Tests Only’.
- Run Test: Click the ‘Run Test’ button to initiate the hard drive diagnostic scan.
The diagnostic test will now run, scanning your laptop’s hard drive for potential issues. If any problems are detected during the test, a message will appear displaying an error code and a description of the problem.
Important: Carefully write down the exact error code and problem description as they appear. This information will be crucial for further troubleshooting or when seeking technical support.
Once the test is complete, note down any error messages and contact technical support or a qualified repair technician for further assistance. Providing them with the error codes you recorded will help them diagnose the issue and recommend the appropriate solution, whether it’s a repair or hard drive replacement. Regularly scanning your hard drive is a good practice for maintaining your laptop’s health and preventing data loss.