
In today’s fast-paced digital world, the ability to scan documents quickly and efficiently is more important than ever. Whether you need to digitize important papers, create backups, or share documents online, a scanner is an indispensable tool. If you own a Canon IP2770 printer, you might be pleased to know that it’s not just a printer; it also functions as a scanner. This guide will walk you through the simple steps to scan documents using your Canon IP2770 printer, ensuring you get clear, digital copies of your physical documents.
What You Need Before You Start
Before diving into the scanning process, ensure you have everything prepared for a smooth experience. Here’s a quick checklist:
- Canon IP2770 Printer: Make sure your printer is powered on and properly connected to your computer.
- Computer: You’ll need a computer (PC or laptop) running Windows operating system to perform the scan.
- Document to Scan: Have the document you wish to scan ready and within reach.
- Printer Driver Installed: Ensure that the correct drivers for your Canon IP2770 printer are installed on your computer. If you haven’t already, you can usually find these on the Canon support website or install them from the installation CD that came with your printer.
Once you have these prerequisites in place, you’re ready to start scanning.
Step-by-Step Guide to Scan with Canon IP2770
The process of scanning with a Canon IP2770 printer is straightforward, thanks to the built-in Windows Fax and Scan utility. Follow these steps to digitize your documents effectively:
Step 1: Prepare Your Printer and Document
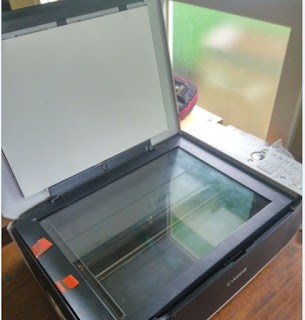
First, lift the scanner unit cover on your Canon IP2770 printer.
Place the document you want to scan face down on the scanner glass. Align the document with the corner markings, usually indicated by arrows or corner symbols, to ensure proper alignment. This step is crucial for preventing skewed scans.
Gently close the scanner unit cover. Ensure it’s properly closed to avoid any light interference during the scanning process.
Step 2: Open Windows Fax and Scan
On your Windows computer, access the “Windows Fax and Scan” application. The easiest way to find it is through the Start Menu. Click on the Start button, then navigate to All Programs or simply type “Fax and Scan” in the search bar and select Windows Fax and Scan from the results.
Step 3: Start a New Scan
Once Windows Fax and Scan is open, look for the New Scan button, typically located in the top left corner of the window and click on it. This action will open a new scan dialog box, preparing the application to communicate with your Canon IP2770 scanner.
Step 4: Preview and Adjust Settings
In the New Scan dialog box, you will see various settings you can adjust before scanning.
- Scanner: Ensure your Canon IP2770 printer is selected from the scanner dropdown menu if you have multiple scanners installed.
- Profile: Choose a scan profile that suits your needs. “Photo” is suitable for images, while “Documents” is better for text documents. You can also customize profiles if needed.
- Color format: Select “Color” for color documents or photos, “Grayscale” for black and white images with shades of gray, or “Black and white” for purely black and white text documents to save file size.
- File type: Choose your preferred output format. JPEG (.jpg) is excellent for photos and images for web use due to its compression. PNG (.png) is better for images with graphics and less lossy compression. For documents, especially multi-page documents, PDF (.pdf) is highly recommended as it keeps the document format consistent and is universally readable.
If you want to preview how your scan will look with the current settings, click the Preview button. This will perform a quick pre-scan and show you a preview image.
Step 5: Scan Your Document
After previewing and adjusting settings as desired, click the Scan button to start the final scan. The printer will now scan your document based on the settings you have selected. The scanning process duration depends on your chosen resolution and document size.
Step 6: Locate Your Scanned Document
Once the scan is complete, the scanned image will appear in the preview area of the Windows Fax and Scan window. This confirms that your document has been successfully scanned.
By default, Windows Fax and Scan saves your scanned files in the “Scanned Documents” folder within your “Documents” library. You can access this folder to view, rename, or move your newly scanned document.
Conclusion
Scanning documents with your Canon IP2770 printer is a simple process that can be accomplished in just a few steps using the Windows Fax and Scan utility. By following this guide, you can easily digitize your important documents, making them easier to store, share, and manage. Whether you’re archiving old papers or sharing documents digitally, your Canon IP2770 printer is a versatile tool that caters to both your printing and scanning needs. Give it a try and experience the convenience of digital document management right at your fingertips.