Scanning documents into PDF format is essential for anyone looking to organize and share information efficiently. PDFs are portable, easy to manage, and universally compatible, making them ideal for everything from educational materials to important records. If you’ve ever needed to compile multiple paper documents into one digital file, you might have wondered how to scan multiple pages into a single PDF. It’s simpler than you might think!
This guide will show you how to combine multiple scanned pages into one PDF file using Microsoft Word, a widely accessible tool. While dedicated scanning software and apps offer direct scan-to-PDF options, this method provides a practical solution, especially when your initial scans are in image formats like JPG or PNG.
Method 1: Converting Image Files to PDF and Combining Them in Word
Often, when you scan documents using a standard scanner or even a smartphone app, the output is a series of image files. If you need these images combined into a single PDF document, Microsoft Word can act as a bridge. Here’s how:
-
Prepare Your Scanned Images: Ensure all your scanned pages are saved as image files (JPG, PNG, etc.) on your computer and are easily accessible.
-
Open Microsoft Word: Launch Microsoft Word on your computer. Create a new blank document.
-
Insert Your Images: Drag and drop your image files directly into the Word document. Alternatively, you can insert them through Word’s menu:
- Go to the Insert tab in the Word ribbon.
- Click on Pictures and choose This Device.
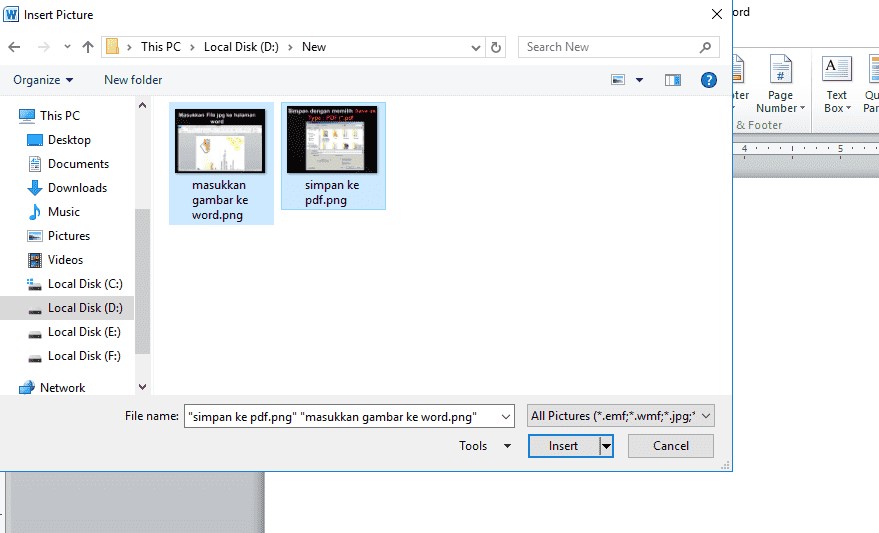
- Navigate to the folder containing your scanned images, select the images you want to include, and click Insert. You can select multiple images at once by holding down the Ctrl key while clicking on each file.
-
Adjust Image Size and Position: Once inserted, the images might be large and take up more than one page each. Adjust the size and position of each image to fit within a single page in your Word document. Click on an image to select it, and drag the corner handles to resize. You can also move the image by clicking and dragging it. Aim to fill each page appropriately.
-
Save as PDF: After arranging all your scanned images within the Word document, it’s time to save it as a PDF file.
- Click on File in the top left corner.
- Select Save As.
- Choose a location to save your PDF file.
- In the “Save as type” dropdown menu, select *PDF (.pdf)**.
- Give your file a name and click Save.
This image highlights the “Save As Type” dropdown menu in Microsoft Word, showing the selection of “PDF (.pdf)” for saving the document in PDF format.*
Word will convert your document, including all the inserted images, into a single PDF file. You now have a multi-page PDF created from your scanned images.
Method 2: Combining Scanned Images Directly into a Single PDF in Word
If you prefer to manage page layout more precisely as you import your scans, you can insert images one by one and control the page breaks manually in Word. This method is useful when you want more control over the formatting of each page in your final PDF.
-
Prepare Your Scan Files: Ensure your scanned documents are saved as image files (JPG or PNG).
-
Open Microsoft Word and Set Margins: Open a new document in Microsoft Word. Adjust the page margins if needed for better image fitting.
- Go to the Layout tab (or Page Layout in older versions of Word).
- Click on Margins.
- Select Normal margins or customize them as needed.
This image displays the “Margins” option under the “Layout” tab in Microsoft Word, demonstrating how to adjust page margins for document formatting.
-
Insert Images Sequentially: Insert your scanned images one after another, adjusting size and position for each page.
- Go to the Insert tab.
- Click on Pictures and then This Device.
- Select the first image and click Insert. Adjust its size and position to fill the page.
- To insert the next image on a new page, go to the end of the current page (after the image), and insert a page break by pressing Ctrl + Enter or by going to Insert > Page Break.
- Repeat the process to insert all your scanned images, ensuring each is on a separate page.
-
Verify Page Order and Save as PDF: Review your document to ensure the images are in the correct order and positioned as desired. Once satisfied, save the document as a PDF file following the same steps as in Method 1 (File > Save As > PDF).
By following these methods, you can effectively compile multiple scanned documents into a single, convenient PDF file using Microsoft Word. This approach is particularly useful when you need a quick solution without relying on specialized PDF editing software. Whether for archiving, sharing, or simply organizing your documents, combining scans into one PDF is a valuable skill for managing digital documents efficiently.