Scanning documents is an essential task in today’s digital world, allowing you to easily convert paper documents into digital files. Modern printers often come equipped with built-in scanning capabilities, eliminating the need for a separate scanner device. If you’re looking to digitize your documents, knowing how to scan with your printer is a valuable skill.
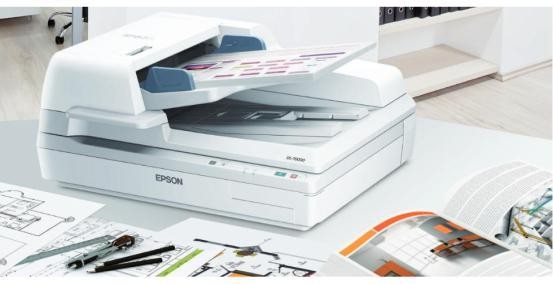 Scanning a document using a multifunction printer. Learn how to scan documents to your computer easily.
This guide will walk you through different methods to scan documents directly from your printer to your computer, ensuring you can easily create digital copies of your important papers.
Scanning Directly from Your Printer to Windows using Windows Fax and Scan
Windows operating systems include a built-in tool called “Windows Fax and Scan” that allows you to operate your printer’s scanner. This feature provides a straightforward way to scan documents without needing additional software. Here’s how to use it:
- Open Windows Fax and Scan: Click on the Start button (Windows logo) on your keyboard and type “Windows Fax and Scan”. Select the “Windows Fax and Scan” application from the search results.
- Start a New Scan: In the Windows Fax and Scan window, click on “New Scan” located in the top left menu.
- Choose Your Scanner: If the correct printer scanner is not automatically selected, click “Change…” under the “Scanner” section.
- Select Your Printer: A “Select Scanner” dialog box will appear. Choose your printer from the list of available devices and click “OK”.
- Configure Scan Settings: Adjust the scan settings according to your needs. You can customize options such as:
- Profile: Choose from predefined profiles like “Photo” or “Documents” or create a custom profile.
- Source: Select the document source, such as “Flatbed” or “Feeder” depending on your printer and document type.
- Color format: Choose “Color”, “Grayscale”, or “Black and white”.
- File type: Select the desired output format, such as JPG, PDF, or TIFF.
- Resolution (DPI): Higher resolution results in better image quality but larger file sizes. 300 DPI is generally sufficient for documents.
- Preview Your Scan (Optional): Click “Preview” to get a preview of your scan before the final scan. This allows you to make adjustments if necessary.
- Scan Your Document: Once you are satisfied with the settings, click “Scan” to start the scanning process.
- Wait for the Scan to Complete: The scanning progress will be displayed. Once finished, your scanned document will appear in the Windows Fax and Scan window. You can then save it to your desired location on your computer.
Scanning with Your Printer’s Software
Many printer manufacturers provide dedicated software applications that offer enhanced scanning capabilities and features beyond the basic functionalities of Windows Fax and Scan. These applications often provide a more user-friendly interface and additional options for document management. Printer software typically offers features like:
- Optical Character Recognition (OCR): Converts scanned images of text into editable text documents.
- Scan to Email: Directly send scanned documents as email attachments.
- Multiple File Format Options: Support for saving scans in various formats like PDF, TIFF, XPS, and more.
- Combine Multiple Scans: Scan and merge multiple pages into a single file, such as a multi-page PDF document.
Example: Scanning with Epson Scan Software
To illustrate scanning using printer-specific software, let’s look at Epson Scan, a common software provided with Epson printers. The process is generally similar for other printer brands as well.
- Prepare Your Document: Place the document you want to scan on the printer’s scanner bed or into the automatic document feeder, depending on your printer model. For Epson L3210 models, the scanner bed is located under the top cover.
- Ensure Printer Connection: Make sure your Epson printer is properly connected to your computer and turned on.
- Install and Open Epson Scan: Install the “Epson Scan” software if you haven’t already. You can usually find the software on the driver CD that came with your printer or download it from the Epson support website. Once installed, open the Epson Scan application.
- Choose a Scan Mode: Epson Scan typically offers different modes, such as:
- Full Auto Mode: For quick and easy scanning with automatic settings.
- Home Mode: Offers basic customization options for home users.
- Office Mode: Optimized settings for office document scanning.
- Professional Mode: Provides advanced settings for experienced users and greater control over scan parameters.
- Select Professional Mode for Photos (Optional): If you are scanning photos and desire optimal image quality with vibrant colors, “Professional Mode” is recommended. This mode allows for finer adjustments to color and image settings. You can preview the scanned image and adjust settings to match the preview before the final scan.
- Preview and Scan: After selecting your mode and adjusting settings, click “Preview” to see how your document will look. Make any necessary adjustments, and then click “Scan” to begin the scanning process.
- Locate Your Scanned Document: Once the scan is complete, your document will be saved in the designated folder. By default, scanned images are often saved in the “Pictures” folder on your computer. The file format will depend on your chosen settings, and can be PDF, JPEG, or other image formats.
For sensitive documents, some printer software allows you to add password protection during the scanning process, enhancing document security. This feature is useful for keeping confidential information safe and secure.
In conclusion, scanning documents with your printer is a straightforward process that can be accomplished through Windows built-in features or your printer’s dedicated software. By following these steps, you can easily convert your paper documents into digital format, making them easier to store, share, and manage.