
The Epson L360 is a versatile all-in-one printer known for its print, copy, and scan functionalities. While setting up the printing function is often straightforward, users sometimes encounter a separate installation process for the scanning feature. This guide will walk you through the steps on how to install the scan driver for your Epson L360 printer, ensuring you can utilize all its features seamlessly.
It’s important to note that the scan driver for the Epson L360 is not automatically installed when you set up the printer driver. Epson provides the scan driver as a separate package, allowing users to customize their installation based on their needs. This article will provide a clear, step-by-step tutorial on how to install the Epson L360 scan driver and get your scanner up and running.
Installing the Epson L360 Scanner Driver: Step-by-Step
To enable the scanning function on your Epson L360 printer, you need to install the dedicated scan driver. Follow these instructions to complete the installation process:
-
Locate the Epson L360 Scan Driver File: The first step is to get the scan driver installation file. If you have the driver CD that came with your Epson L360, you can use that. Alternatively, for the most up-to-date version, it’s recommended to download the driver directly from the Epson support website. Search for “Epson L360 scan driver download” on the official Epson website or a trusted driver download site. For your convenience, you can also download the Epson L360 scan driver here.
-
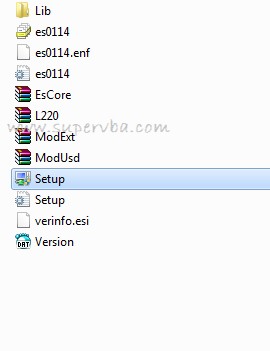
Run the Setup Application: Once you have downloaded or located the driver file (usually a ZIP file), extract its contents. Look for a file named “Setup” or “Setup.exe” within the extracted folder. Double-click this application file to begin the installation process.
-
Initiate Installation – Click “Next”: The Epson Scan driver installation window will appear. Click the “Next” button to proceed with the setup process. This step initiates the driver installation on your computer.
-
Accept the License Agreement: You will be presented with the Software License Agreement. Read through the terms and conditions carefully. To continue with the installation, you must agree to these terms. Check the box that says “I Accept the terms and conditions of the agreement” and then click “Next”.
-
Wait for Installation to Complete: The installation process will now begin. Allow the installer to run without interruption. The time it takes for installation may vary depending on your system speed.
-
Installation Successful – Click “Finish”: Once the installation is successfully completed, you will see a confirmation message, typically stating “Epson Scan was successfully installed“. Click the “Finish” button to close the installer. The scan driver installation is now complete.
-
Power On Your Epson L360 Printer: Ensure your Epson L360 printer is turned on. Press the power button on your printer to switch it on.
-
Connect the USB Cable: Connect the USB cable from your Epson L360 printer to a USB port on your computer or laptop. Windows should automatically detect the new hardware and begin installing the necessary USB drivers.
-
Driver Installation Confirmation: Wait for the USB driver installation to finish. You will typically see a notification in the bottom right corner of your screen confirming “Device driver software installed successfully“. This indicates that your Epson L360 printer is now properly connected and recognized by your computer for both printing and scanning.
With these steps completed, the scan function of your Epson L360 printer should be ready to use.
How to Scan with Epson L360: A Quick Guide
Now that you have successfully installed the Epson L360 scan driver, you can start scanning documents and photos. Here’s how to use the scanner:
-
Open Epson Scan Software: Locate the Epson Scan application on your computer. You can usually find it on your desktop or in your Start Menu (Windows) or Applications folder (Mac). The icon is typically labeled “Epson Scan”. Double-click to open the application.
-
Select Scan Mode: Epson Scan offers different scanning modes. Initially, it might open in “Full Auto Mode” which is suitable for quick scans. For more control over scan settings, change the mode to “Office Mode” or “Home Mode” or “Professional Mode” depending on your needs and software version. These modes allow you to adjust settings like document type, resolution, file format (JPEG, PDF, etc.), and file name.
-
Preview Your Scan: Place your document or photo on the scanner glass. In the Epson Scan software, click the “Preview” button. This will perform a pre-scan, allowing you to see how the scanned image will look before the final scan.
-
Initiate Scan: After previewing and adjusting any settings, click the “Scan” button to start the scanning process. The Epson L360 scanner will now scan your document or photo.
-
Locate Your Scanned File: Once the scan is complete, your scanned file will be saved to your computer. By default, scanned images are often saved in the “My Pictures” folder within your C: drive (on Windows). You can configure the save location in the Epson Scan settings if needed.
Congratulations! You have successfully installed the Epson L360 scan driver and performed your first scan. You can now easily digitize documents and photos using your Epson L360 all-in-one printer. Enjoy the convenience of scanning with your Epson L360.