
Windows operating systems are designed with built-in functions that continuously protect your system as you perform daily tasks. PC files are susceptible to damage or corruption, and to mitigate this, Windows includes several mechanisms to safeguard these files. System scans are one such tool, designed to identify and attempt to repair corrupted system files.
However, sometimes these scans might not function perfectly. You might encounter the error message: “Windows Resource Protection found corrupt files but was unable to fix some of them,” leaving you unsure of the next steps.
In such situations, understanding and utilizing Windows Resource Protection becomes crucial. This service is a registry protection tool that routinely checks for modifications or errors in system files. Its primary function is to locate corrupted system files, remove them, and replace them with healthy cached copies stored within your Windows PC’s folders. This acts as a vital security and prevention system, protecting your computer from complete system failure due to file corruption.
System files are paramount for ensuring your PC operates smoothly. Damage or corruption to these files can significantly impact the overall system performance. If you’re facing this issue and seeking solutions, this article is designed for you.
What is sfc /scannow?
SFC stands for System File Checker. It’s a utility integrated into modern Windows operating systems like Windows 7, 8, 10, and Vista. This tool is invaluable for users as it helps in checking for system file corruption and rectifying registry data issues.
Essentially, the System File Checker scans your system to verify the integrity of protected system files. The command sfc /scannow specifically instructs the utility to scan all protected system files on your computer. It meticulously checks file versions and repairs any faulty files by replacing them with correct versions from a repair source. Consequently, it’s an essential tool for troubleshooting system problems stemming from file corruption.
Understanding the “Windows Resource Protection Found Corrupt Files But Was Unable to Fix Some of Them” Error
The “Windows Resource Protection Found Corrupt Files But Was Unable to Fix Some of Them” error can arise due to several reasons:
- False Positives: Certain Nvidia .dll files may trigger false positive results, incorrectly flagging them as corrupt.
- Third-Party Software Interference: This error can also occur if installed applications interfere with the System File Checker (SFC) scan. Many users experiencing this issue report that SFC completes without errors when run during a clean boot. This indicates a conflict with software loaded during normal startup.
- Irregular System File Corruption: In some instances, the error indicates a level of corruption that is beyond the repair capabilities of default Windows utilities like SFC and DISM. In such severe cases, reinstalling the operating system might be the only solution.
- Windows Utility Error: The error might simply indicate that the “System File Checker” utility itself is unable to repair the identified corrupt files, possibly due to the extent of the damage or internal errors within the utility. Again, operating system reinstallation may be considered as a last resort.
Regardless of the cause, addressing corrupted system files is crucial for maintaining a stable and smoothly running operating system. If you are currently looking for methods to repair these corrupt files that System File Checker couldn’t fix, this article provides several verified solutions.
Explore the following methods that users have successfully employed in similar situations to resolve issues with corrupted system files. Alternative solutions are also presented. Let’s delve into these solutions and resolve the problem efficiently.
Read More: 5 Ways to Fix Error 50 on Windows How to Install Windows 11 PE Best Windows PE Builder
Solutions to Fix Windows Resource Protection Errors
Here are several methods to address the “Windows Resource Protection found corrupt files but was unable to fix some of them” error:
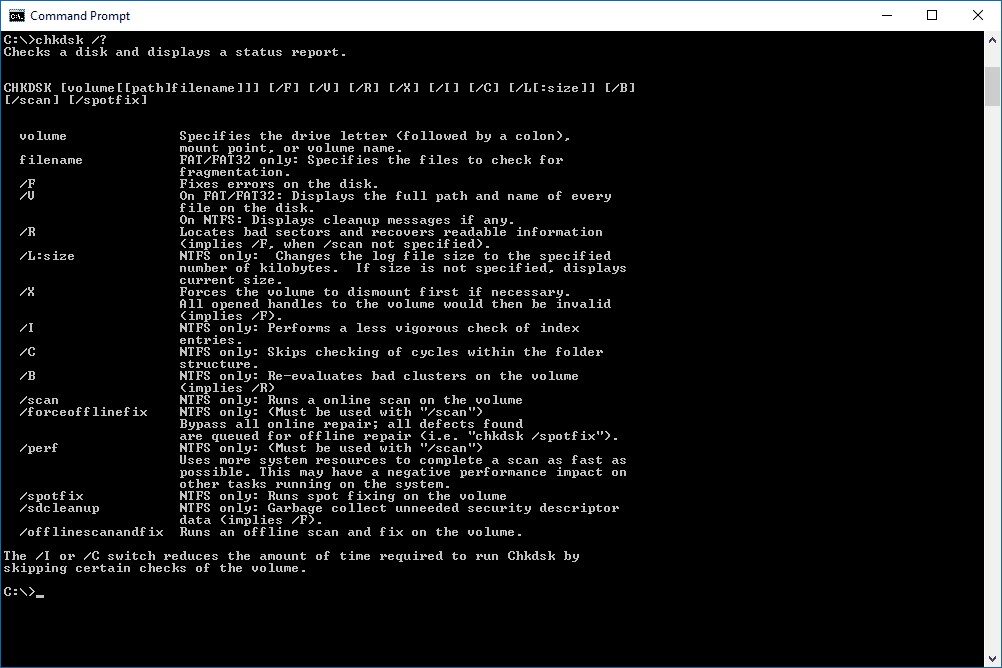
Solution 1: Check and Repair Hard Disk Errors
Hard disk errors can sometimes be the underlying cause of system file corruption. Using the chkdsk utility can help identify and fix these errors.
Step 1. Open an elevated Command Prompt by typing “cmd” in the search bar, then press CTRL + SHIFT + ENTER. This ensures you run Command Prompt with administrator privileges.
Step 2. In the Command Prompt window, type the command chkdsk /f and press Enter. The /f parameter instructs chkdsk to fix any errors it finds. After the process completes, restart your PC.
If you need to check and repair errors on a specific drive other than your primary system drive (usually C:), type chkdsk [drive letter]: /f. For example, to check drive E, type chkdsk E: /f and press Enter.
Solution 2: Repair Errors with the “System Update Readiness” Tool or DISM
For older systems like Windows Server 2008, Vista, and Windows 7, the “System Update Readiness” tool can be effective. For newer systems (Windows 8, 8.1, 10, and Server 2012 and later), the Deployment Image Servicing and Management (DISM) tool is recommended.
# For Windows Server 2008, Vista, and Win 7:
Step 1. Download the “System Update Readiness” tool installer appropriate for your operating system version. Once downloaded, double-click the installer file to begin installation. After installation, restart your PC.
Step 2. Open Command Prompt as Administrator again and type the command sfc /scannow. After running the System Update Readiness tool, SFC may now be able to repair the files successfully.
# For Win Server 2012, Win 8 & 8.1, Win 10:
Step 1. Open an elevated Command Prompt by typing “cmd” in the search bar, then press CTRL + SHIFT + ENTER.
Step 2. Type the following command: Dism.exe /Online /Cleanup-Image /Restorehealth in the Command Prompt and press Enter. Wait for DISM to repair the component store. This process might take some time. Upon completion, a “repair successful” message should appear.
Solution 3: Run SFC in Safe Mode
Starting Windows in Safe Mode loads only essential drivers and services. This can help bypass conflicts from third-party software that might be interfering with the SFC scan.
Step 1. Press Win + R keys to open the Run dialog box. Type msconfig and press Enter to open System Configuration.
Step 2. In the System Configuration window, navigate to the Boot tab. Under “Boot options,” check the Safe boot option. Click OK, and then restart your PC. Your computer will now boot into Safe Mode.
Step 3. Once in Safe Mode, open Command Prompt as Administrator and run the command sfc /scannow. After the scan completes in Safe Mode, reopen System Configuration (msconfig) and uncheck the Safe boot option on the Boot tab to return to a normal Windows boot. Restart your PC again.
Solution 4: Run SFC /SCANNOW from Windows Recovery Environment (WinRE)
Running SFC from the Windows Recovery Environment allows you to perform an offline scan, which can be more effective in certain situations.
Step 1. Boot your computer from Windows installation media (DVD or USB). If you don’t have installation media, you may need to create one using another working computer. Once booted from the media, wait for the “Install Windows” interface to appear.
Step 2. In the “Windows Setup” window, click Next, and then click Repair your computer at the bottom left. In the “System Recovery Options” menu, navigate to Troubleshoot then Advanced options, and finally select Command Prompt.
Step 3. To run a full system file check offline, enter the following command in the Command Prompt window and press Enter:
sfc /scannow /offbootdir=C: /offwindir=C:Windows
Note: Replace C: with the actual drive letter where your Windows installation is located if it’s different. This command specifies the boot directory and Windows directory for the offline SFC scan.
After the process is complete, type exit and press Enter to close the Command Prompt, and then restart your PC.
Solution 5: Examine SFC Scan Details
For a more detailed analysis of the SFC scan results, you can examine the CBS.log file.
Step 1. Open Command Prompt as Administrator and type the following command, then press Enter:
findstr /c:"[SR]" %windir%LogsCBSCBS.log > "%userprofile%Desktopsfcdetails.txt"
Step 2. This command will extract entries related to System File Checker ([SR]) from the CBS.log file and save them to a text file named “sfcdetails.txt” on your desktop. Open the “sfcdetails.txt” file using Notepad. Review the log file to identify the specific corrupt files that SFC couldn’t repair. You can then attempt to manually replace these files with known good copies from a healthy Windows system or installation media. This is an advanced step and requires caution.
Solution 6: Perform a Windows 10 Repair Upgrade
If other methods fail, a Windows 10 Repair Upgrade can refresh your system files while keeping your personal files and applications intact. This is essentially a reinstallation of Windows that preserves your data.
Step 1. Mount your Windows 10 ISO image or insert your Windows 10 USB/DVD installation media.
Step 2. From File Explorer, navigate to the mounted drive or installation media and run setup.exe to start the Windows 10 Setup.
Step 3. The Windows 10 Setup window will appear. Choose the “Upgrade: Install Windows and keep files, settings, and applications” option (this wording may vary slightly depending on your Windows version). Follow the on-screen prompts. You may be asked to download updates during the process; it’s generally recommended to allow this.
Step 4. Proceed through the setup wizard, accepting the license terms when prompted. The setup will check for compatibility and prepare for installation. Finally, click Install when you reach the “Ready to install” screen.
Step 5. The repair upgrade process will begin, and your computer will restart several times. This process can take a significant amount of time. Once completed, you should have a refreshed Windows 10 installation with your files and applications preserved, and hopefully, the system file corruption issues resolved.
Free Download | Windows Version Windows Recoverit Free Download | Mac Version Mac Recoverit
Conclusion
The System File Checker is a valuable tool provided by Windows for addressing corrupted system files. However, as we’ve seen, the sfc /scannow command isn’t always able to fix every issue. In such cases, understanding alternative solutions is essential.
While this article has outlined several methods to troubleshoot system file errors when SFC /scannow fails, remember that preventative measures are also crucial. Regularly backing up your operating system is highly recommended. System backups allow you to perform a System Restore, reverting your system to a previously healthy state if system issues become unresolvable through repair methods.
Frequently Asked Questions
What is SFC /Scannow?
SFC (System File Checker) is a Windows utility that scans all protected system files for corruption. It attempts to repair any corrupted files by replacing them with cached copies from the system32dllcache folder.
How can files become corrupted?
Files can become corrupted due to various reasons, including errors during the storage process. Power failures or system crashes while saving files are common causes of file corruption. Malware infections and hard drive issues can also lead to file corruption.
Can corrupted files be recovered?
Yes, corrupted files can often be recovered. Professional data recovery tools like Wondershare Recoverit Data Recovery are designed to recover and repair various types of files from different storage devices.
What can you do to prevent SFC /Scannow from failing to fix errors?
To proactively maintain system health and potentially prevent SFC failures, consider using the DISM utility regularly to check and repair the system image. Running SFC in Safe Mode or from the Windows Recovery Environment can also increase its effectiveness in certain situations by minimizing interference from other software.
Partition Recovery
Partition Management, Computer Tips, Windows