
Are you looking to expand your viewing options on your Openbox satellite receiver? Performing a blind scan is a crucial step to discover all available channels, especially after satellite changes or initial setup. This guide will walk you through the process of performing a blind scan on your Openbox, ensuring you don’t miss out on any free-to-air or subscription channels.
Understanding Blind Scan on Openbox
A blind scan is a powerful feature on digital satellite receivers like Openbox. Unlike a regular channel scan that relies on pre-programmed transponder lists, a blind scan systematically searches across a wide frequency range to identify all active transponders and channels, even those not officially listed. This is particularly useful for:
- Finding new channels: Satellite providers frequently add or change channels. A blind scan ensures you capture these additions.
- Discovering free-to-air channels: Uncover channels that are broadcast without encryption and are freely available.
- Setting up a new satellite dish: When you install a new dish or realign an existing one, a blind scan helps you verify signal reception and identify available channels from the targeted satellite.
- Bypassing outdated channel lists: Pre-loaded channel lists in your receiver can become outdated. A blind scan provides a fresh, up-to-date channel lineup.
While the original article you provided focused on setting up CCcam for accessing subscription channels, performing a blind scan is the foundational step to ensure you have a complete channel list before even considering subscription services. Let’s delve into how to perform this essential function on your Openbox.
Performing a Blind Scan on Openbox X5 / X5 Pro / Alphabox Pro / Openbox X5 Super
These Openbox models share a similar menu interface, making the blind scan process quite consistent. Here’s how to do it:
-
Access the Installation Menu: Press the MENU button on your remote control. Navigate to and select Installation.
-
Enter Antenna Setup: Within the Installation menu, find and select Antenna Setup or Satellite Setting. The exact wording might slightly vary depending on your specific model and firmware version.
-
Select Satellite: Choose the satellite you wish to scan from the satellite list. Ensure the LNB settings are correctly configured for your dish and LNB type. If you are unsure, consult your dish and LNB documentation.
-
Initiate Blind Scan: Look for a Scan Mode or Search Mode option. Select this option and change the scan type to Blind Scan. This is the crucial step to ensure a comprehensive search.
-
Start the Scan: Once Blind Scan is selected, look for an option to Search or Scan. Press OK to start the blind scan process.
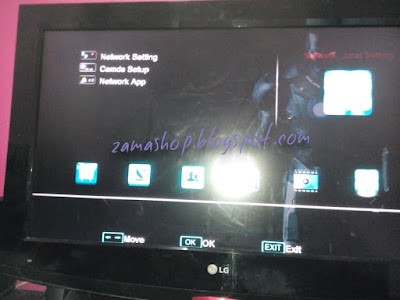
This image, originally used to illustrate menu navigation, can be conceptually relevant here to show the general menu structure of Openbox/Skybox devices where users would navigate to find scan settings.
-
Wait for the Scan to Complete: The blind scan will take some time as it systematically searches frequencies. The progress is usually displayed on the screen. Do not interrupt the process.
-
Save the Scan Results: Once the scan is complete, you will be prompted to save the found channels. Select Yes or Save to store the new channel list.
Performing a Blind Scan on Skybox F3, F4, F5 Series
Skybox F series receivers, while slightly different in interface from Openbox X series, also offer blind scan functionality. Here’s how to access it:
-
Enter the Menu: Press the Menu button on your Skybox remote.
-
Navigate to Installation: Go to the Installation menu.
-
Access TP Scan or Antenna Setup: Look for options like TP Scan, Satellite Scan, or Antenna Setup. Select the option that allows you to configure scanning.
-
Select Blind Scan Mode: Within the scan settings, you should find a Scan Mode or Search Type dropdown. Choose Blind Scan from the options.
-
Choose Satellite (if necessary): If prompted, select the satellite you intend to scan.
-
Start Scanning: Initiate the scan by selecting Scan or Search.
This image, while showing CCcam setup, provides a visual of the Skybox menu style, which is relevant to understanding the general interface users will encounter when navigating to blind scan settings.
-
Wait for Completion and Save: Allow the blind scan to finish. Once done, save the newly found channels when prompted.
Blind Scan on Freesat V7 Combo and V8 Pro
Freesat V7 Combo and V8 Pro receivers also support blind scan. The process is quite similar:
-
Press Menu: Press the MENU button on your Freesat remote.
-
Go to Installation or Channel Search: Navigate to menus like Installation, Channel Search, or Satellite Search.
-
Select Satellite and Scan Type: Choose the satellite to scan and then select Blind Scan as the Scan Mode or Search Type.
-
Start the Blind Scan: Initiate the scan process.
-
Save Channels: After the scan, save the discovered channels.
This image, showing CCcam Client Setup, is included to provide a consistent visual style example of menu screens on these types of receivers, helping users orient themselves even when looking for blind scan options.
Tips for a Successful Blind Scan
- Stable Satellite Signal: Ensure your satellite dish is properly aligned and receiving a strong, stable signal before initiating a blind scan. Poor signal quality can lead to incomplete or inaccurate scan results.
- Correct LNB Settings: Double-check that your LNB settings (LNB type, LO frequency) in the receiver are correctly configured to match your LNB. Incorrect settings will prevent you from receiving channels.
- Patience: Blind scans take longer than regular scans. Be patient and allow the process to complete without interruption.
- Review Channel List: After the blind scan, review the newly created channel list. You may need to organize or delete unwanted channels.
Conclusion
Performing a blind scan on your Openbox, Skybox, or Freesat receiver is a straightforward process that unlocks the full potential of your satellite TV setup. By following these steps, you can ensure you are receiving all available channels, keeping your viewing experience fresh and up-to-date. Remember to perform a blind scan periodically to catch any new channels or changes in satellite broadcasts. This proactive approach ensures you maximize your entertainment options and stay ahead of satellite TV updates.