
Navigating your TCL TV settings is straightforward, allowing you to customize your viewing and listening experience. Whether you want to fine-tune the picture, optimize the sound, or scan for available channels, the TV settings menu is your central hub. This guide will walk you through accessing and adjusting these settings, with a particular focus on how to auto scan for channels using your TCL TV remote.
You can easily access the TV settings to adjust various parameters including picture and sound.
-
Begin by pressing the dedicated Settings button on your TCL TV remote. This button typically looks like a gear icon . Pressing this will bring up the TV settings menu directly on your screen.
-
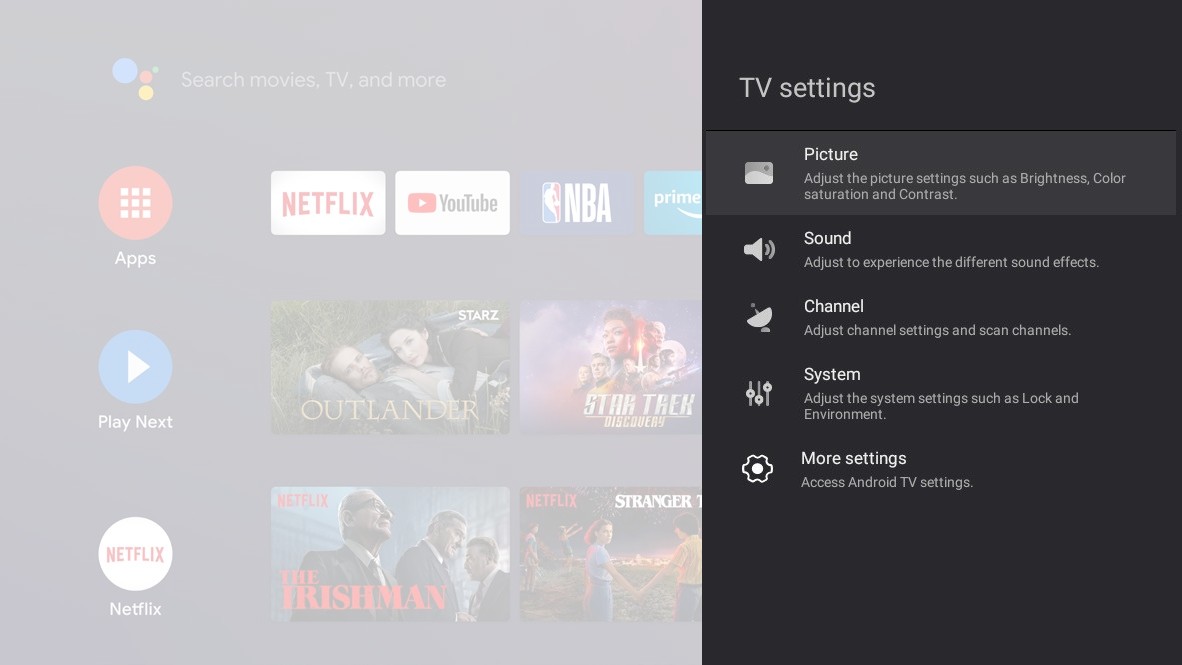
Once the TV settings menu is displayed, use the directional arrow buttons (▲/▼) on your remote to navigate through the menu options. Highlight the setting category you wish to adjust, and then press either the OK button or the right arrow button (►) to enter the corresponding sub-menu.
-
Within each sub-menu, you’ll find a list of adjustable options. Again, use the directional arrow buttons (▲/▼) to select the specific menu option you want to modify. Press OK or ► to access the adjustment interface, option list, or further sub-menus related to your selection.
-
If you need to go back to the previous menu level, simply press the Back button on your remote.
-
To exit the settings menu completely and return to watching TV, press the Settings button again. This will close the menu and allow you to resume normal TV viewing.
Note: Another way to access the TV settings menu is by pressing the Home button on your TCL TV remote, then navigating to TV settings and pressing OK. Keep in mind that some settings options might be unavailable depending on the current input source you are using.
Optimizing Your Picture Settings
The picture settings menu is essential for tailoring the visual output of your TCL TV to your personal taste and the content you are watching. These settings are adaptable for each broadcasting type and input source, ensuring a consistently optimal viewing experience.
-
Press the Settings button on your TCL remote, navigate to Picture using the directional buttons, and then press OK to enter the Picture settings menu.
-
Within the Picture menu, use the arrow buttons (▲/▼) to scroll through the available picture items. Select the item you wish to adjust and press OK to access its settings.
-
Adjust each picture item according to your preferences. Experiment with the settings to find what looks best to you.
Here’s a breakdown of common picture settings you might find:
-
Picture preset: This option allows you to select a pre-configured picture mode that is optimized for different viewing scenarios. Use the arrow buttons (▲/▼) to cycle through options like Standard, Dynamic, Movie, Sports, etc., and press OK to select. Each preset automatically adjusts multiple picture parameters for the best viewing experience in that mode.
-
Brightness: Adjusts the overall luminance of the screen. Use the left/right arrow buttons (◄/►) to increase or decrease the brightness level. Higher brightness settings are generally suitable for well-lit rooms, while lower settings are better for darker environments.
-
Color saturation: Controls the intensity of colors in the picture. Use the left/right arrow buttons (◄/►) to adjust the color saturation to your liking. Higher saturation results in more vivid and intense colors, while lower saturation makes colors appear more muted.
-
Advanced settings: This section provides access to more granular picture adjustments:
- Brightness settings: Fine-tune aspects like Contrast (the difference between the brightest and darkest parts of the image) and Black level (the darkness of the black areas).
- Color: Adjust settings such as Color saturation (as mentioned above) and Tint (adjusts the balance between green and magenta hues).
- Clarity: Control image sharpness with settings like Sharpness (enhances edge definition) and Digital noise reduction (reduces unwanted artifacts and graininess, especially in lower quality content).
- Screen settings: Options here may include Screen mode or Aspect Ratio, allowing you to choose how the image is displayed on the screen (e.g., 16:9, 4:3, Zoom).
-
Apply all picture mode: This setting lets you decide whether the picture settings you’ve configured should apply only to the current input source or to all input sources connected to your TV. Use the arrow buttons (▲/▼) to choose your preference and press OK.
-
Picture reset: If you want to revert all picture settings back to their factory defaults, select Picture reset. Use the arrow buttons (▲/▼) to highlight OK and then press OK again to confirm the reset.
Customizing Your Sound Settings
The sound settings menu is your gateway to optimizing the audio output of your TCL TV. Just like picture settings, sound settings can be adjusted for different broadcasting types and input sources, ensuring the best possible audio experience for everything you watch.
-
Press the Settings button on your remote control, navigate to Sound using the directional buttons, and then press OK to enter the Sound settings menu.
-
In the Sound menu, use the arrow buttons (▲/▼) to scroll through the available sound items. Select the item you want to adjust and press OK.
-
Adjust each sound item to your desired levels and preferences.
Common sound settings include:
-
Sound preset: Similar to picture presets, sound presets offer pre-configured audio modes optimized for different content types. Enter the Sound mode menu and use the arrow buttons (▲/▼) to select options like Standard, Movie, Music, Sports, etc., and press OK. You can also select Reset within this menu to restore all sound presets to their factory defaults.
-
TV placement: This setting allows you to inform the TV about its physical placement, which can subtly affect audio output. Use the arrow buttons (▲/▼) to select whether your TV is placed on a Tabletop or Wall-mounted, and then press OK.
-
Audio only: Selecting Audio only will turn off the TV display, allowing you to listen to audio content without the screen being on. The screen will typically turn off after about 10 seconds. In audio-only mode, pressing any button will turn the TV screen back on.
-
Advanced settings: This section provides more detailed audio customization options:
- Menu sounds: Toggle menu sounds on or off. This setting controls whether you hear a sound effect when you press buttons on the remote to navigate menus.
- Balance: Adjust the audio balance between the left and right speakers. This is useful if your speakers are not equidistant from your listening position or if you have hearing imbalances.
- Auto Volume control: This feature aims to automatically level out volume fluctuations, making quiet sounds louder and loud sounds quieter. This can be helpful to avoid sudden volume jumps during commercials or scene changes.
- Digital audio out: Select the digital audio output format for connecting to external audio devices like soundbars or receivers. Options may include PCM, Dolby Digital, or DTS, depending on your TV and connected devices.
- Digital audio out delay: If you experience a timing mismatch between the audio and video (lip-sync issues), this setting can help. It’s typically only available when Digital audio out is set to PCM and allows you to introduce a slight delay to the audio output to synchronize it with the video.
Scanning and Managing Channels
The channel settings are crucial for setting up and managing your TV channels, especially for over-the-air (antenna) or cable TV. These settings are primarily relevant when you are in TV mode. Let’s focus on how to auto scan channels, which is key for tuning into available broadcasts.
-
Ensure your TCL TV is in TV mode. You may need to select “TV” as your input source. Then, press the Settings button on the remote control, navigate to Channel, and press OK.
-
Within the Channel menu, you will find options for channel management, including Channel scan.
-
Channel scan: This is where you initiate the process of searching for available TV channels.
- Country/Region: Before scanning, it’s essential to set your Country/Region correctly. This ensures that the TV scans for channels and arranges them according to your local broadcasting standards. Select Country/Region and press OK/►. You might be prompted for a password (default is 1234 unless you’ve changed it in the System settings). Enter the password, then use the arrow buttons (▲/▼) to select your country or region and press OK to confirm.
- Automatic search: This is the auto scan function. Select Automatic search and press OK/►. You may be presented with options like Tuner mode (Antenna or Cable). Choose the appropriate tuner mode based on how you receive TV signals. Then, navigate to Search and press OK to begin the channel scan. The TV will automatically scan for all available channels in your area.
- Manual scan: For more advanced users, Manual scan allows you to scan for channels by manually entering parameters like channel number or frequency. This can be useful in specific situations, but for most users, Automatic search is sufficient.
-
Channel organizer: After performing an automatic channel scan, the TV arranges channels in a preset order. If you wish to customize the channel list, select Channel organizer to reorder, skip, or favorite channels.
-
Clean channel list: This option resets your channel list, deleting all saved channels.
-
EPG (Electronic Program Guide): Access the Electronic Program Guide, which provides on-screen program listings for available channels.
-
Channel diagnostics: Run tests to check your TV picture, sound, and signal strength. This can be helpful for troubleshooting reception issues.
-
Time shift: This feature, if available and enabled, allows you to pause and rewind live TV.
Exploring System Settings
The system settings menu provides access to a range of settings that affect the overall operation and features of your TCL TV.
-
Press the Settings button on the remote control, navigate to System, and then press OK.
-
In the System menu, use the arrow buttons (▲/▼) to select the system options you want to adjust and press OK.
Examples of system settings include:
-
Parental Controls (formerly Lock): Set up parental controls to restrict viewing based on age ratings. You’ll need to set a four-digit password (default 1234) to use this feature.
-
TLink (CEC): This setting relates to HDMI CEC (Consumer Electronics Control) functionality.
- Auto power on: Allows the TV to automatically turn on when you power on a connected CEC device (like a DVD player) using that device’s remote.
- Auto Standby: Enables CEC devices to automatically enter standby mode when you turn off the TV with the TV remote.
-
Game mode: Optimizes the TV for gaming by reducing input lag. Toggle this function on or off by pressing OK.
-
Environment: Select the environment where you are using the TV. Options might include Home or Store mode. Home mode is generally recommended for typical home use.
-
Advanced settings:
- LED indicator: Control the behavior of the LED indicator light on the TV when it’s in standby mode. You can set it to flashing, off, or on.
By understanding and utilizing these TV settings, you can fully customize your TCL TV to match your viewing preferences and optimize your overall entertainment experience. Remember to explore each menu and experiment with the settings to find what works best for you.