
Creating personalized car decals has never been easier thanks to the Brother Scan N Cut. As a car customization enthusiast at carcodepro.com, I’m excited to show you how this amazing machine can turn your drawings, printed graphics, or even text into stunning vinyl car decals. Whether you want to add a unique touch to your vehicle, create personalized gifts, or even start a small decal business, the Scan N Cut is your perfect partner.
This guide will walk you through the process of using your Brother Scan N Cut to craft professional-looking car decals. We’ll cover everything from scanning your designs to applying the finished vinyl to your car, ensuring a seamless and satisfying crafting experience. Let’s dive into the world of custom car decals!
Why Choose Brother Scan N Cut for Car Decals?
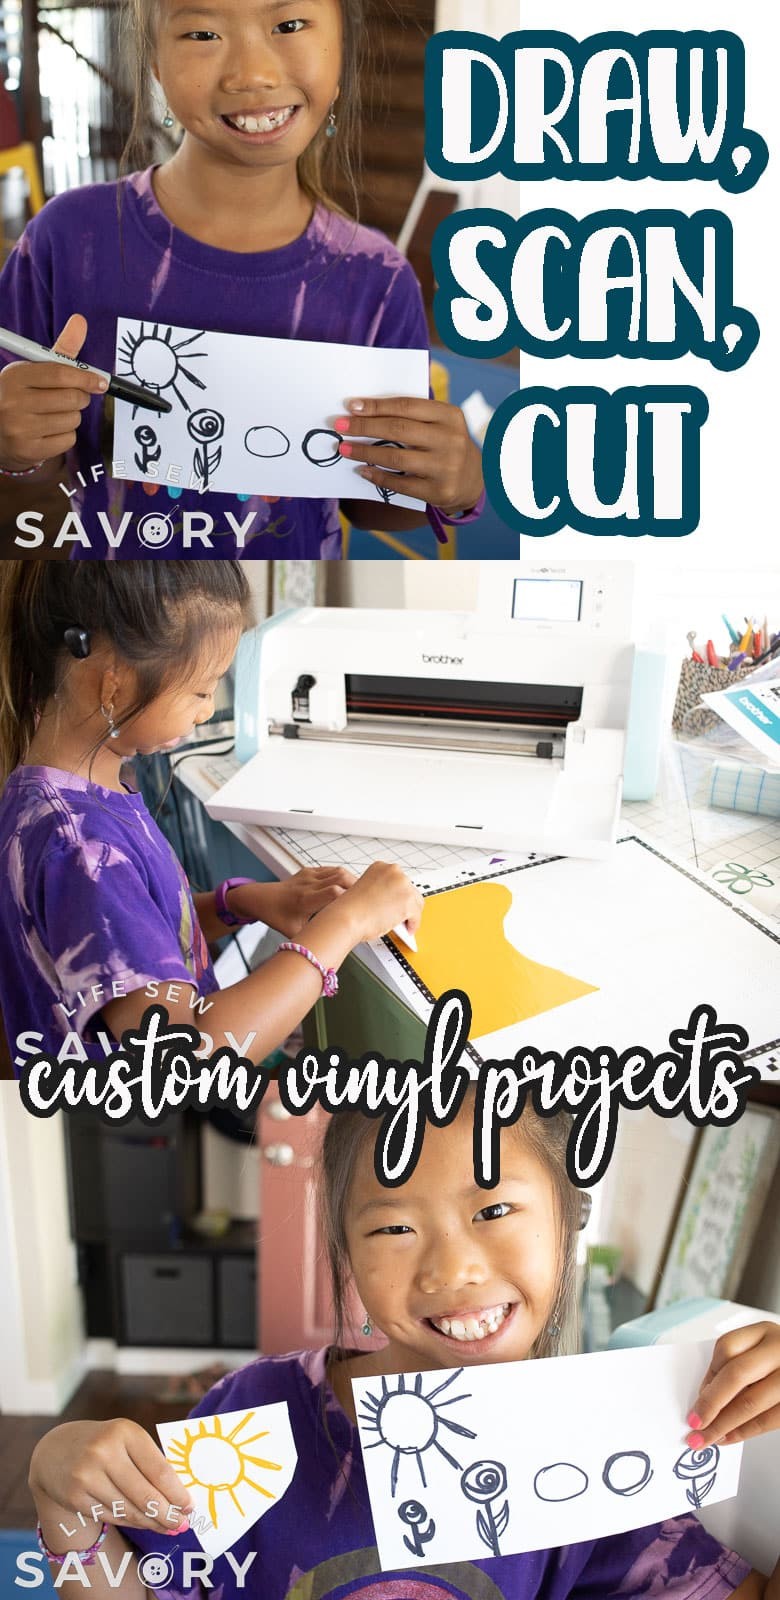
For years, I’ve explored various methods for creating car decals, and the Brother Scan N Cut stands out for its versatility and user-friendliness. Unlike traditional methods that require intricate hand-cutting or complex software skills, the Scan N Cut simplifies the entire process. Its built-in scanner is a game-changer, allowing you to directly scan and cut designs without needing a computer for basic projects. This is especially beneficial for car enthusiasts who want to quickly bring their creative ideas to life and personalize their vehicles.
The Brother Scan N Cut excels in:
- Precision Cutting: Achieve clean and intricate cuts perfect for detailed car decal designs.
- Direct Scanning: Scan hand-drawn art or printed images directly into the machine, turning them into cuttable data.
- User-Friendly Interface: Easy-to-navigate controls make it accessible for both beginners and experienced crafters.
- Versatility: Works with various vinyl types, including adhesive and heat transfer vinyl, expanding your car decal possibilities.
Materials You’ll Need to Make Car Decals
Before we begin, gather these essential materials:
- Brother Scan N Cut Machine: The star of our show, ensuring precise cuts for your car decals.
- Car Decal Vinyl: Specifically designed for outdoor use, weather-resistant adhesive vinyl is crucial for car decals. Choose colors and finishes that match your vision.
- Transfer Tape: Essential for transferring your delicate vinyl decals from the backing sheet to your car surface.
- Cutting Mat (Low Tack): Holds your paper or printed image securely during scanning.
- Weeding Tools: Help remove excess vinyl from your design after cutting, leaving only your desired decal.
- Squeegee or Application Tool: For smooth application of the decal onto your car, eliminating bubbles and ensuring good adhesion.
- Design or Image: Your hand-drawn sketch, printed graphic, or text that you want to turn into a car decal.
Step-by-Step Guide: Creating Car Decals with Brother Scan N Cut
Let’s walk through the process of turning your chosen design into a stunning car decal using your Brother Scan N Cut.
1. Scanning Your Design into the Scan N Cut
The scanning feature is where the Brother Scan N Cut truly shines, especially when working with unique, hand-drawn designs or pre-printed graphics for your car decals.
- Prepare Your Design: Place your drawing or printed image on a low-tack mat. This type of mat is less sticky and will prevent damage to your paper when you remove it. For best scanning results, ensure your lines are clear and bold.
- Load the Mat: Insert the mat into your Brother Scan N Cut machine.
- Scan to Cut Data: On your machine’s screen, select the “Scan” option and then choose “Scan to Cut Data.” This will scan your design and convert it into cuttable lines.
- Initiate Scanning: Press the “Scan” button. The machine will scan your design, and it will appear on the screen once completed.
2. Editing and Preparing Your Design for Cutting
Once scanned, your design may need a little tweaking before cutting your car decal vinyl.
- Zoom and Inspect: Use the zoom function on the Scan N Cut screen to closely examine the scanned lines. Ensure all the lines you want to cut are clearly captured.
- Adjust Settings: Fine-tune the settings to ensure both inside and outside lines are visible if you want them cut. This is important for intricate car decal designs.
- Crop Unwanted Areas: Use the cropping tool to remove any unnecessary parts of the scanned image, focusing only on the design you want for your car decal.
- Delete Imperfections: If needed, use the delete function to erase any stray lines or unwanted elements from the scanned design.
3. Cutting Your Car Decal from Vinyl
Now for the exciting part – cutting your car decal!
- Prepare Your Vinyl: Place your chosen car decal vinyl onto a standard tack cutting mat. Ensure the vinyl is smooth and securely adhered to the mat.
- Select Cut Settings: On the Scan N Cut, choose the “Cut” option. It’s crucial to ensure the “Half Cut” setting is ON. This setting cuts through the vinyl layer but leaves the backing paper intact, which is essential for creating decals.
- Load and Cut: Load the mat with the vinyl into the machine and press “Cut.” The Scan N Cut will precisely cut your design into the car decal vinyl.
4. Weeding and Applying Transfer Tape
After cutting, you’ll need to weed away the excess vinyl and prepare your decal for application to your car.
- Weeding: Carefully remove the excess vinyl around your design using weeding tools. Leave only the car decal design on the backing sheet.
- Apply Transfer Tape: Cut a piece of transfer tape slightly larger than your decal. Peel off the backing of the transfer tape and carefully apply it over your vinyl decal. Use a squeegee to firmly adhere the transfer tape to the decal, ensuring it picks up the vinyl.
- Lift Decal: Gently peel the transfer tape (with the vinyl decal attached) away from the original backing sheet. Your car decal should now be adhered to the transfer tape, ready for application.
5. Applying Your Car Decal
The final step is applying your custom decal to your car.
- Clean the Surface: Thoroughly clean the area on your car where you intend to apply the decal. Use rubbing alcohol to remove any wax or grease for optimal adhesion.
- Position Decal: Carefully position the decal (still on the transfer tape) onto your car. Use masking tape to temporarily hold it in place if needed, ensuring correct placement.
- Apply Decal: Use your squeegee to firmly rub over the transfer tape, starting from the center and moving outwards. This adheres the vinyl decal to your car surface.
- Remove Transfer Tape: Slowly and carefully peel away the transfer tape, starting from a corner. Peel at a low angle to ensure the vinyl decal stays adhered to your car.
- Final Touches: Use your squeegee one last time to smooth out any bubbles and ensure the decal is firmly in place.
Tips for Long-Lasting Car Decals
To ensure your custom car decals look fantastic for years to come:
- Choose High-Quality Car Decal Vinyl: Opt for vinyl specifically designed for outdoor use and car applications. These are UV and weather-resistant, ensuring longevity.
- Proper Surface Preparation: Thorough cleaning is key. Remove all wax, dirt, and grease before application.
- Apply in Ideal Conditions: Avoid applying decals in extreme temperatures (too hot or too cold) or in direct sunlight. Mild weather is best for application.
- Avoid Car Washes Immediately: Give your new decal 24-48 hours to fully adhere before going through a car wash. Hand washing is recommended for decal longevity.
Get Creative with Your Car Decals
The possibilities are endless when it comes to car decal designs with your Brother Scan N Cut. Consider these ideas to get your creativity flowing:
- Monograms and Initials: Personalize your car with your initials or family monogram.
- Pet Silhouettes: Show your love for your furry friends with custom pet decals.
- Hobbies and Interests: Display decals representing your hobbies, sports, or passions.
- Business Logos: Create professional-looking decals for business vehicles.
- Fun Quotes and Sayings: Add a touch of personality with your favorite quotes or funny sayings.
- Kids’ Artwork: Turn your children’s drawings into adorable and unique car decals (as inspired by the original project!).
With the Brother Scan N Cut, creating custom car decals is not only easy but also incredibly rewarding. Unleash your creativity and personalize your ride today! Start designing, scanning, and cutting your way to unique and eye-catching car decals that reflect your style and personality.