
Digitizing your paperwork has never been easier, thanks to the built-in scanning capabilities of your iPhone and iPad. No need for bulky scanners; your Apple devices come equipped with powerful tools to quickly and efficiently scan documents using just a few taps. This guide will walk you through the simple steps on how to scan documents using both the Notes and Files apps, transforming your iPhone or iPad into a portable scanner.
Scanning Documents Using the Notes App
The Notes app is a versatile tool that goes beyond simple note-taking. It includes a handy document scanning feature that is perfect for quickly digitizing receipts, invoices, or any paper document you need to save or share. Here’s how to use it:
- Initiate a New Note or Open an Existing One: Launch the Notes app on your iPhone or iPad. You can start a new note specifically for your scanned document or add a scan to an existing note.
- Access the Scan Function: Within your chosen note, look for the Attachment button, which is typically represented by a camera icon. Tap this button, and a menu will appear. From this menu, select Scan Documents . This will activate your device’s camera, ready for scanning.
- Position Your Document: Place the document you want to scan on a flat, well-lit surface. Frame the document within the camera’s viewfinder on your iPhone or iPad screen.
- Automatic or Manual Capture: By default, your device is likely set to Auto mode. In this mode, the scanner will automatically detect the document’s edges and capture the scan as soon as it’s properly framed and in focus. If you prefer more control, or if auto mode isn’t working perfectly due to lighting or document type, you can use Manual mode. To manually capture a scan, tap the Shutter button (the circular button at the bottom) or press either of the Volume buttons.
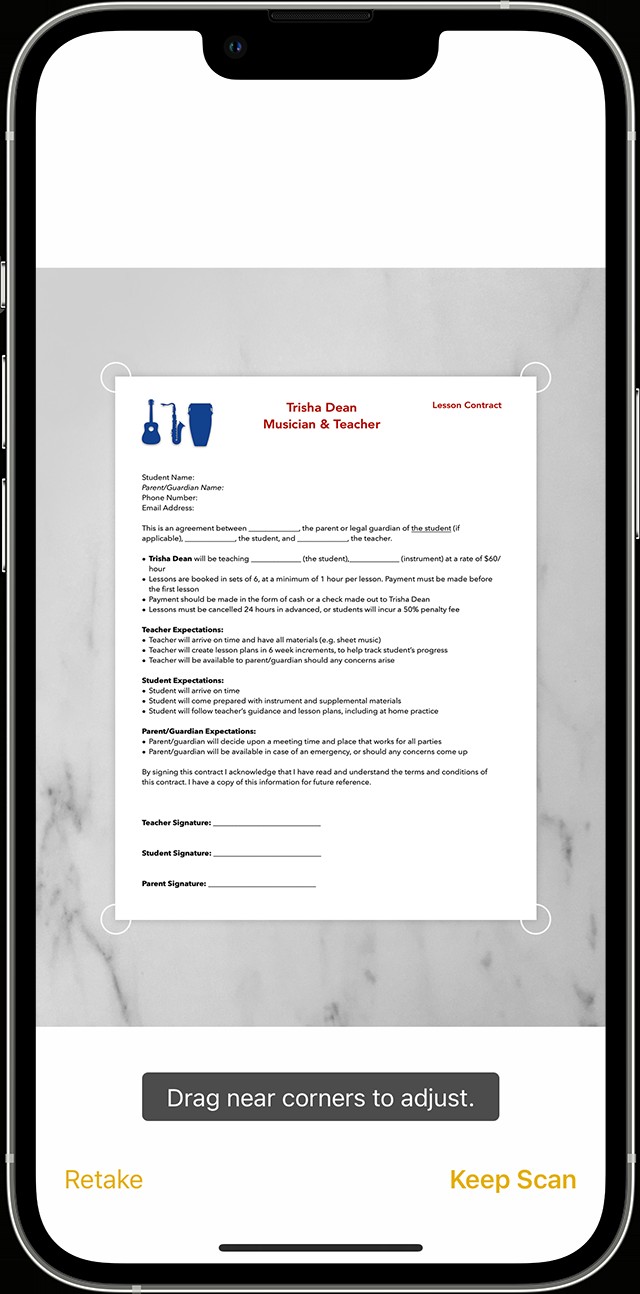
- Adjust the Scan (If Necessary): After capturing the initial scan, you may need to refine the scanned area. Drag the corners of the scan to precisely adjust the edges to fit the page perfectly. Once you are satisfied with the adjusted area, tap Keep Scan.
- Save or Continue Scanning: At this stage, you can tap Save to finalize your scanned document. If you have multiple pages to scan, tap add additional scans to continue the process and compile them into a single document.
 In Notes with iOS, you can scan documents with your iPhone camera.
Alternatively, within an open note, you can also tap the More button (usually three dots in a circle or ellipsis icon), and then select Scan from the dropdown menu to initiate the scanning process.
For users interested in integrating their Apple ecosystem further, you can also find out how to use the Continuity Camera to scan notes from your iPhone or iPad to your Mac, streamlining your workflow across devices. Additionally, for those using older iOS versions, resources are available to guide you on older processes, such as how to scan a document in Notes in iOS 17 and earlier.
Digitally Signing Scanned Documents in Notes
Scanning documents is just the first step; often, you need to sign them as well. The Notes app also allows you to easily add your signature to scanned documents:
- Open Your Scanned Document: In Notes, locate and open the note containing the document you wish to sign. Tap on the scanned document to view it.
- Access Markup Tools: Tap the Markup button , usually located in the top right corner of the screen. This will open up a set of annotation and editing tools.
- Insert Your Signature: Within the Markup toolbar, tap the Add button (often a plus sign ‘+’). From the options that appear, select Signature .
- Choose or Create a Signature: If you have previously saved signatures, you can choose one from the list. If not, or if you want to create a new one, tap Add or Create Signature. You can sign directly on the screen using your finger or an Apple Pencil for more precision if you have a compatible iPad and Apple Pencil.
- Position and Adjust Your Signature: Once your signature is inserted, a signature box will appear on your document. You can drag this box to position your signature wherever needed. You can also adjust the size of the signature by dragging the corners of the box.
- Finalize: Tap Done to save the signed document. Your signature is now part of the scanned document.
For manual signing directly onto the document, after following steps 1–2 to enter Markup, simply select a pen or marker tool from the toolbar and sign directly on the document with your finger or Apple Pencil.
Scanning Documents Using the Files App
The Files app provides another method to scan documents, particularly useful if you prefer to manage your scanned files directly within your file system. Here’s how to scan documents using the Files app:
- Open the Files App: Launch the Files app on your iPhone or iPad.
- Access the Scan Documents Feature: In the Files app, tap the More button which is typically represented by three dots in a circle or ellipsis icon, usually located in the top corner, depending on your current view in the Files app. From the menu that appears, select Scan Documents.
- Capture and Adjust Scan: The scanning process within the Files app is very similar to that in Notes. Your camera will activate. Position your document, and it will either auto-scan or you can manually capture the image using the Shutter button or Volume buttons. Adjust the corners if necessary and tap Keep Scan.
- Save Your Scan: Tap Save to save the scanned document to your Files app. You will be prompted to choose a location to save your file, allowing you to organize your scanned documents within your preferred folder structure in Files.
Maximizing Your Scanning Capabilities
Both Notes and Files apps offer robust scanning features that make document digitization straightforward on your iPhone or iPad. Exploring further into Notes on your iPhone or iPad can reveal even more functionalities to enhance your productivity. Whether you choose Notes for quick scans and integration with notes, or Files for organized file management, knowing how to scan documents on your device streamlines your workflow and reduces paper clutter.
Published Date: