Scanning documents has become an indispensable task in our digital age. Whether you’re aiming to create digital backups, share documents online, or simply organize your files, knowing how to scan documents on your computer is a valuable skill. This guide will walk you through various methods to scan documents directly on your computer, ensuring you can digitize your paperwork efficiently and effectively.
Scanning Documents on Android Devices
For Android users, several straightforward methods are available to scan documents directly from your smartphone, which can then be accessed and managed on your computer.
1. Scanning Documents Using Google Drive
Google Drive, a widely used cloud storage service, also includes a built-in document scanning feature. Here’s how to use it:
- Open Google Drive App: Launch the Google Drive application on your Android phone. If you don’t have it, download it for free from the Google Play Store.
- Initiate Scan: Tap the “+” icon, usually located at the bottom right corner of the screen.
- Select Scan Option: Choose the “Scan” option from the menu.
- Capture Document: Position your document and take a photo. Google Drive automatically attempts to detect the document edges and crop the image. You have the option to adjust the crop, rotate the image, or retake the photo if needed.
- Finalize and Save: Once satisfied, tap “Done“. You’ll be prompted to enter a file name. After naming your file, click “Save“. The scanned document will be saved as a PDF in your Google Drive, accessible from your computer.
2. Utilizing Tiny Scanner Application
Tiny Scanner is a dedicated mobile scanning app that provides more features for document scanning and organization:
- Install Tiny Scanner: Download and install Tiny Scanner from the Google Play Store. It is available for free.
- Start Scanning: Open the Tiny Scanner app. Choose between the camera icon to take a new photo of your document or the gallery icon to select a pre-existing photo from your phone’s gallery.
- Adjust and Crop: The app will automatically detect document edges. Adjust the crop area as necessary and tap “OK“.
- Save and Format: You can then save your scanned document in either PDF or JPG format, ready to be transferred or accessed on your computer.
3. Scanning with CamScanner
CamScanner is another popular mobile app known for its robust scanning capabilities and additional features like OCR (Optical Character Recognition):
- Download CamScanner: Install the CamScanner application from the Google Play Store. A free version is available.
- Open and Scan: Launch CamScanner and you can choose to log in with your email or use it directly without logging in. Tap the camera button and take a photo of the document you want to scan.
- Edit and Enhance: CamScanner offers editing tools to crop, enhance, and apply filters to your scan. Adjust as needed.
- Save as PDF: Name your document and save it, preferably in PDF format for document integrity, making it ready to use on your computer.
Scanning Documents on iOS Devices
For iPhone and iPad users, iOS provides built-in tools and app options to scan documents that seamlessly integrate with your computer ecosystem.
4. Scanning Documents Using the Notes App
The Notes app on iOS has a hidden gem: a document scanner. It’s pre-installed and incredibly convenient:
- Open Notes App: Launch the Notes application on your iPhone or iPad.
- Create a New Note: Start a new note by tapping the compose icon (a square with a pencil).
- Access Scan Feature: Tap the “+” icon within the note interface (often above the keyboard). In the menu that appears, tap the “+” icon again.
- Select “Scan Documents”: Choose the “Scan Documents” option. The camera will activate, ready to scan.
- Capture and Adjust: Position your document and the scanner will automatically capture it. If you are not satisfied with the initial scan, use “Retake“. If it’s good, tap “Keep Scan“.
- Edit and Save: You can crop, rotate, or apply filters to enhance the scan. Once done, tap “Done” in the top left corner to save the scanned document within your note. You can then share or access this note, and the attached PDF, from your Mac or other devices.
5. Utilizing Microsoft Lens
Microsoft Lens (formerly Office Lens) is a free app from Microsoft that’s excellent for scanning documents and whiteboards:
- Install Microsoft Lens: Download and install Microsoft Lens from the App Store. It’s free to use.
- Scan Document: Open the Microsoft Lens app and point your camera at the document to be scanned.
- Adjust and Enhance: The app automatically detects edges. You can manually adjust crop, rotate, and more.
- Save and Export: Tap the checkmark to finalize your scan. Name your document, choose a save location (like OneDrive for easy computer access), and tap “Save“.
Scanning Documents Using a Printer
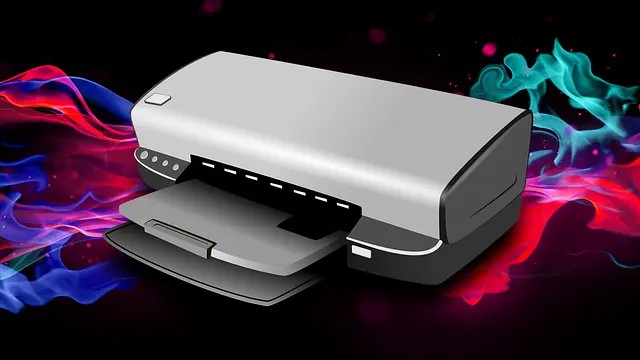 Scanning a document using a printer's scanner bed.
Many modern printers come with scanning functionality. Here’s how to use your printer to scan documents to your computer:
6. Scanning with Epson L3110 Printer
- Prepare Printer and Document: Place your document face-down on the scanner glass of your Epson L3110 printer.
- Open Epson Scan: On your computer, open the Epson Scan software. This software is usually installed with the printer drivers. If not, you may need to download it from Epson’s official website.
- Configure Scan Settings: A pop-up window with scan settings will appear. You can adjust settings like document type, resolution, and color mode as needed. Once configured, click “Scan“.
- Retrieve Scanned Document: Wait for the scanning process to complete. Once finished, the scanned document is typically saved in the “My Documents” folder on your computer, or a location you specified in the settings.
7. Scanning with Epson L4150 Printer
The process for the Epson L4150 is similar to the L3110:
- Load Document: Place your document on the Epson L4150 scanner bed.
- Launch Epson Scan: Open the Epson Scan application on your computer.
- Automatic Mode Scan: Choose the “Full Automatic Mode” for a quick and easy scan, then click the “Scan” button.
- Locate Scanned File: After scanning is complete, the document will be available in your “My Documents” folder.
8. Scanning with Epson L360 Printer
- Document Placement: Place your document on the scan bed of your Epson L360 printer.
- Open Epson Scan Software: Start the Epson Scan application on your computer.
- Initiate Scan: Select “Full Automatic Mode” and click “Scan“.
- Access File: The scanned file will be saved in your “My Documents” folder.
9. Scanning with Canon MP237 Printer
- Connect and Prepare: Ensure your Canon MP237 printer is connected to your computer and powered on. Place your document on the scanner.
- Open Windows Fax and Scan: On your computer, open “Windows Fax and Scan“.
- New Scan: Click “New Scan“. Select your Canon MP237 printer if it’s not automatically selected.
- Adjust Settings: Change the scan settings to “Document”, choose color or black and white, file type, and resolution as per your needs.
- Scan: Click “Scan” to start the process.
- Find Your Scan: The scanned document will be saved in the “My Documents” folder under “Scanned Documents“.
10. Scanning with HP Deskjet 2135 Printer
- Printer Setup: Make sure your HP Deskjet 2135 is connected to your computer. Place the document on the scanner bed.
- Access HP Scan: On your computer, go to “Start > Devices and Printers“. Right-click on “HP Deskjet 2135” and select “HP Scan“.
- Configure Output: Choose your desired output format, typically JPG with 300 dpi resolution is suitable for documents. Uncheck “Separate Files” if you are scanning multiple pages into one document (if applicable).
- Start Scan: Click “Scan“.
- Locate File: Once scanning is done, the document is automatically saved in the “Scanned Documents” folder within “My Documents“.
Scanning Directly on Windows and macOS Computers
For computers directly connected to a scanner, or using built-in scanning features, here’s how to scan on both Windows and macOS.
11. Scanning on Windows 10
- Connect Scanner: Ensure your scanner is turned on and connected to your Windows 10 computer.
- Open Windows Scan App: Search for and open the “Windows Scan” application from the Start Menu.
- Select Scanner and Options: In the Windows Scan app, click “Scan“. Choose your scanner from the dropdown menu if multiple scanners are connected.
- Configure Scan Type and Save Location: Select the scan source (flatbed or document feeder), file type (JPEG, Bitmap, PNG, etc.), and choose where to save the file on your computer.
- Initiate Scan: Click “Scan” at the bottom to begin scanning.
- Access Scanned File: Once the scan is complete, the document will be saved in your chosen location.
12. Scanning on Windows 7 and 8
- Open Windows Fax and Scan: Go to “Start” and open “Windows Fax and Scan“.
- Start New Scan: Click “New Scan” in the toolbar.
- Adjust Settings: In the new scan dialog, configure settings such as document type (photo or document), source, and paper size.
- Set Format and Resolution: Adjust color format, file type, and resolution according to your needs.
- Preview (Optional): You can use the “Preview” option to see how the scan will look before finalizing.
- Scan: Click “Scan” to start the scanning process.
13. Scanning on macOS
- Open Image Capture: On your Mac, open the “Image Capture” application. It’s located in the “Applications” folder, inside the “Utilities” folder.
- Select Scanner: In Image Capture, select your scanner from the list on the left.
- Choose Save Location: Choose where you want to save the scanned document from the “Scan To” menu, typically “Pictures” is a common choice.
- Adjust Size and Settings: Select the appropriate size from the provided list. For more detailed settings, click “Show Details“.
- Scan Document: Click “Scan” to start scanning your document.
Managing Documents After Scanning
Once you’ve scanned your documents, efficient management is key. Consider using cloud storage solutions to backup and access your scanned documents from anywhere. For documents requiring signatures, you can leverage e-signature solutions like Mekari Sign.
Mekari Sign is a digital signature platform that is recognized by KOMINFO and PSrE, ensuring your digital signatures are legally valid in Indonesia. After scanning your important documents, you can upload them to Mekari Sign to add legally binding electronic signatures, streamlining your document workflows and enhancing security.
Try Mekari Sign Now!
By following these methods, you can easily scan documents on various devices and computers, making document digitization a breeze. Whether for personal organization or professional needs, mastering document scanning is a valuable asset in today’s digital world.