
Digitizing documents has become increasingly essential in our fast-paced world. Whether it’s receipts, contracts, or important papers, having digital copies readily available offers convenience and organization. Your iPhone and iPad are equipped with powerful built-in tools that transform them into portable document scanners. This guide will walk you through the simple steps to scan files using your Apple devices, ensuring you can easily digitize and manage your documents on the go.
Scanning Documents Using the Notes App
The Notes app on your iPhone and iPad is not just for jotting down quick thoughts; it also houses a handy document scanning feature. This method is perfect for quickly capturing and saving documents directly within your notes, keeping everything organized in one place.
Step-by-Step Guide to Scanning in Notes
-
Open Notes and Start or Select a Note: Begin by launching the Notes app on your iPhone or iPad. You can either create a new note specifically for your scanned document or navigate to an existing note where you want to add the scan.
-
Access the Scan Documents Feature: Within your chosen note, look for the Attachment button. It’s typically located above the keyboard and resembles a “+” icon. Tap this button to reveal a menu of options. From this menu, select “Scan Documents”. This action will activate your device’s camera, preparing it for scanning.
Alt text: Scan Documents icon in iOS Notes app, indicating the option to initiate document scanning.
-
Position Your Document for Scanning: Place the document you wish to scan on a flat, well-lit surface. Position your iPhone or iPad camera directly above the document, ensuring the entire page is visible within the camera frame.
-
Automatic or Manual Capture:
- Auto Mode: By default, your device is likely set to Auto mode. In this mode, the scanner intelligently detects the document edges and automatically captures the scan once the document is properly framed and steady.
- Manual Mode: If you prefer to control the exact moment of capture or if Auto mode isn’t working optimally, you can manually initiate the scan. Tap the Shutter button (the circular button at the bottom center) or press one of the Volume buttons on your device.
-
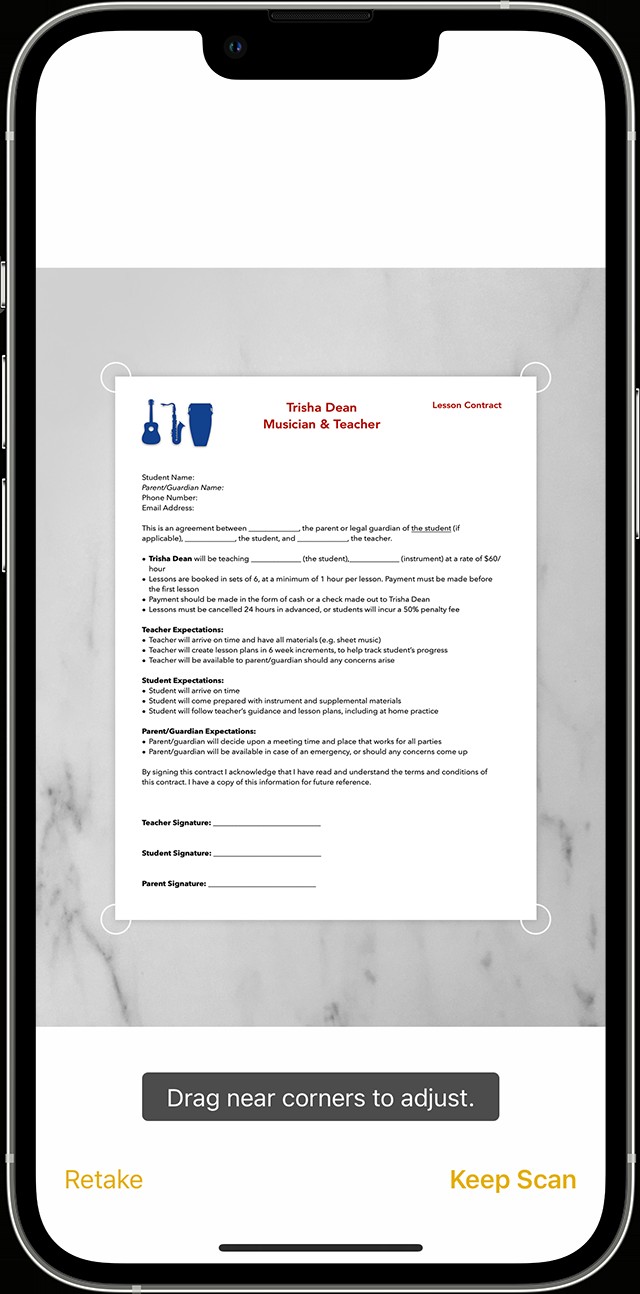
Adjust and Keep Scan: After capturing the initial scan, you may need to adjust the scanned image. Drag the corners of the highlighted scan area to precisely fit the page boundaries of your document. Once you are satisfied with the adjustment, tap “Keep Scan” to confirm.
-
Save or Add More Scans: You now have the option to either “Save” the scanned document if it’s complete or tap “add additional scans” to continue scanning more pages into the same document. This is particularly useful for multi-page documents.
 In Notes with iOS, you can scan documents with your iPhone camera.
Alternatively, within an open note, you can also tap the More button (often represented by three dots ...) and then select “Scan” to initiate the scanning process.
Signing Documents Directly in Notes
Beyond just scanning, the Notes app also allows you to sign documents digitally, streamlining workflows that require signatures.
-
Open the Scanned Document: Launch the Notes app and tap on the note containing the document you wish to sign. Then, tap on the scanned document itself to open it.
-
Access Markup Tools: Look for and tap the Markup button. This icon typically resembles a pen tip or a marker. Tapping it will bring up a toolbar with various annotation and editing options.
Alt text: Markup icon in iOS Notes, indicating access to annotation and editing tools for documents.
-
Add Your Signature: In the Markup toolbar, tap the Add button (usually a “+” icon). From the menu that appears, select “Signature”.
Alt text: Signature icon in iOS Notes Markup tools, used to add saved or new signatures to documents.
- Saved Signature: If you have previously saved a signature, it will be available for you to select.
- Create New Signature: If you need to create a new signature, tap “Add or Remove Signature” and then the “+” icon. Use your finger or an Apple Pencil (on compatible iPads) to sign on the screen. Tap “Done” to save your signature.
-
Position and Adjust Signature: Once your signature is added, a signature box will appear on your document. You can drag this box to place it in the desired location. Use the handles on the box to resize and adjust the signature to fit appropriately.
-
Finalize and Save: After positioning and resizing your signature, tap “Done” to apply the signature to your document. Your signed document is now saved within the note.
For manual signing, after accessing the Markup tools (steps 1-2), simply select a pen or marker tool from the toolbar and use your finger or Apple Pencil to sign directly on the document.
Using the Files App to Scan Documents
The Files app provides another convenient way to scan documents on your iPhone and iPad. This method is ideal for when you want to save your scans directly into specific folders within your Files app, offering more control over file organization and storage locations.
-
Open the Files App: Launch the Files app on your iPhone or iPad.
-
Access the Scan Documents Option: In the Files app, tap the More button. This is typically represented by three dots
...and is usually located in the top or bottom toolbar depending on your current view in the Files app. From the menu that appears, tap “Scan Documents”. This will activate your device’s camera for scanning. -
Scanning Process: The scanning process within the Files app is identical to that in the Notes app. Follow steps 3-6 from the “Scanning Documents Using the Notes App” section above to capture, adjust, and save your scans using the Files app interface.
Tips for High-Quality Scans
To ensure you get the best possible scans from your iPhone or iPad, consider these tips:
- Optimal Lighting: Scan your documents in a well-lit environment. Avoid harsh shadows or direct sunlight, which can create uneven lighting across the document. Natural, diffused light is ideal.
- Flat Surface: Place your document on a flat, stable surface. This helps prevent distortion and ensures the entire document is in focus.
- Steady Hands: Keep your hands steady while scanning to avoid blurry images. If necessary, rest your elbows on a table to stabilize your device.
- Clean Camera Lens: Ensure your iPhone or iPad camera lens is clean and free of smudges or dirt. A clean lens is crucial for sharp, clear scans.
- Contrast Background: Place your document on a background that contrasts with the paper color. For example, scan white paper on a dark surface for better edge detection.
By following these simple steps and tips, you can effectively utilize your iPhone and iPad as powerful document scanners, making it easy to digitize, organize, and manage your important files wherever you are. Explore the capabilities of the Notes and Files apps to streamline your document management workflow today!