
Is your Windows Defender refusing to scan? Are you looking for solutions to resolve this frustrating issue? This guide will walk you through effective methods to fix Windows Defender on Windows 7, 8, 10, and 11, ensuring your system remains protected.
Windows Defender, also known as Windows Security Center in later versions of Windows 10, is an integral antivirus program built directly into the Windows operating system. It provides real-time protection against various threats, including spyware, malware, and viruses that can compromise your PC. Normally, it diligently scans your system and neutralizes potential threats upon detection.
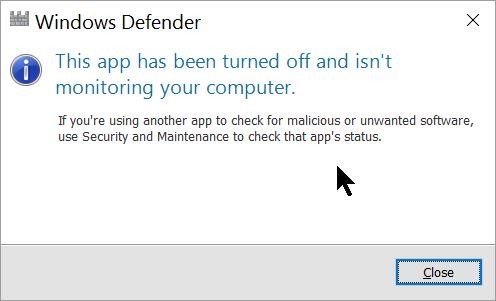
However, many users encounter situations where Windows Defender fails to initiate a scan, even after clicking the “turn on” button. Some users also report encountering unexpected errors that prevent Windows Defender from opening or functioning correctly, particularly after uninstalling third-party antivirus software like Avast, Bitdefender, McAfee, or AVG.
These problems can stem from various sources, including conflicts with previously installed third-party antivirus programs, corrupted system registry entries, software conflicts, and more. Regardless of whether you are using Windows 7, Windows 8, Windows 10, or Windows 11, these issues are relatively common.
So, what should you do if you find Windows Defender not working correctly? How can you effectively troubleshoot and fix Windows Defender scan issues in Windows? Let’s explore the solutions.
How to Troubleshoot and Fix Windows Defender Scan Problems in Windows 11/10/8/7
Here are several methods you can try to get Windows Defender scanning and protecting your system again:
Method 1: Remove Third-Party Antivirus Software
Often, conflicts arise when third-party antivirus software is installed alongside Windows Defender. Windows operating systems are designed to automatically disable Windows Defender when another antivirus program is detected. This is intended to prevent conflicts between security applications.
If you have previously installed a different antivirus program, even if you believe you have uninstalled it, remnants might still be interfering with Windows Defender. The most effective first step is to completely uninstall any third-party security software from your PC.
To uninstall a program, follow these steps:
-
For Windows 7: Open Control Panel and navigate to Programs > Programs and Features.
-
For Windows 11/10/8: Open Control Panel and navigate to Programs > Uninstall a program.
-
Locate the third-party antivirus software in the list of installed programs.
-
Right-click on the antivirus program and select Uninstall or Uninstall/Change to begin the removal process.
-
Follow the on-screen prompts to complete the uninstallation.
-
Restart your PC after uninstalling the software.
-
After restarting, try to launch Windows Defender again and check if it can now be activated and perform scans.
Method 2: Restart the Security Center Service
Windows Defender relies on specific services to function correctly. If these services are not running properly, it can lead to issues like Windows Defender failing to turn on or scan. Restarting the Security Center service can often resolve these problems.
Here’s how to restart the Security Center service:
- Press the Windows key + R on your keyboard to open the Run dialog box.
- Type services.msc in the Run box and press Enter. This will open the Services window.
- In the Services window, scroll down and locate the Security Center Service (it might also be listed as Windows Security Service in newer versions of Windows).
- Right-click on Security Center Service and select Restart from the context menu.
- Wait for the service to restart.
- Once restarted, check if Windows Defender can now be activated and perform scans without issues.
Method 3: Run the System File Checker (SFC) Scan
If Windows Defender is still not scanning and you are encountering unexpected errors, there might be corruption within your system files. The System File Checker (SFC) is a built-in Windows utility that can scan for and repair corrupted system files.
Here’s how to run an SFC scan:
-
Type cmd in the Windows search box (Windows 7/8/10/11).
-
Right-click on Command Prompt from the search results and select Run as administrator. You need administrator privileges to run SFC.
-
In the Command Prompt window, type the following command and press Enter:
sfc /scannow -
The SFC utility will begin scanning your system files and attempt to repair any corrupted or missing files. This process can take some time, so please be patient and allow it to complete. You will see a verification progress percentage during the scan.
-
Once the scan reaches 100% and completes, close the Command Prompt window.
-
Restart your computer and check if the Windows Defender scan issue is resolved.
Method 4: Modify Group Policy Settings
In some cases, Windows Defender might be disabled through Group Policy settings, preventing it from functioning or scanning. This is more common in managed environments but can also occur on personal computers due to misconfigurations. Modifying the Group Policy to ensure Windows Defender is not disabled can resolve the scan issue.
Note: Group Policy Editor (gpedit.msc) is not available in Windows 10/11 Home editions. This method is primarily for Windows Professional, Enterprise, and Education editions.
Here’s how to check and modify Group Policy settings for Windows Defender:
-
Press the Windows key + R on your keyboard to open the Run dialog.
-
Type gpedit.msc and press OK to open the Local Group Policy Editor.
-
In the Local Group Policy Editor, navigate through the left-hand pane to: Computer Configuration > Administrative Templates > Windows Components > Windows Defender Antivirus.
-
In the right-hand pane, find and double-click on the setting named Turn off Windows Defender Antivirus (or similar, depending on your Windows version, it might be Disable Windows Defender Antivirus).
-
In the pop-up window for this setting, check if it is set to Enabled. If it is, this is likely disabling Windows Defender.
-
To re-enable Windows Defender, select Not Configured or Disabled.
-
Click Apply and then OK to save the changes.
-
Close the Local Group Policy Editor and restart your computer for the changes to take effect.
-
After restarting, check if Windows Defender is now enabled and able to perform scans.
By following these methods, you should be able to troubleshoot and resolve most issues that prevent Windows Defender from scanning your system, ensuring your computer remains protected against threats.