
Scanning documents to create digital copies is a fundamental task in today’s digital age. Modern printers, like the Epson L5290, often come equipped with integrated scanning features, eliminating the need for a separate scanner. Understanding how to scan with your printer is essential for efficient document management.
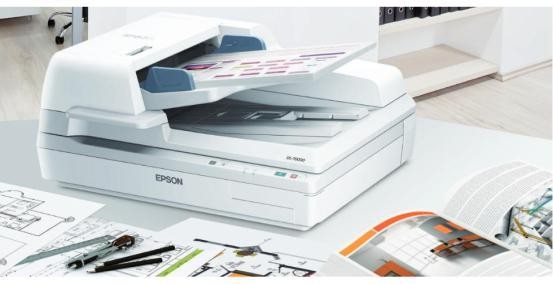 Paper documents being scanned on an Epson printer
This guide will explore different methods to scan documents using your Epson L5290 printer, ensuring you can easily convert your physical documents into digital files. Before you begin, ensure your Epson L5290 printer is properly connected to your computer and powered on.
Scanning from Your Epson L5290 to Windows
Windows operating systems offer built-in functionalities to perform scans directly from your printer. You can utilize the “Windows Fax and Scan” feature, a standard application within Windows, to initiate the scanning process. Here’s how to scan from your Epson L5290 printer to your Windows computer using this feature:
- Click on the Start button, typically located at the bottom left corner of your screen, or press the Windows key on your keyboard.
- Type “Windows Fax and Scan” or simply “wfs” into the search bar.
- Select “Windows Fax and Scan” from the search results to open the application.
- Once the application is open, click on “New Scan” located in the toolbar at the top left.
- A new window will appear with scan settings. If your Epson L5290 printer is not automatically selected under “Scanner,” click on “Change…”.
- In the “Select Scanner” dialog box, choose your Epson L5290 printer from the list of available devices and click “OK”.
- Adjust the scan settings according to your needs. You can typically configure settings like document type, color format, resolution (DPI), and file type.
- Click “Preview” to get a preliminary view of your scan. This allows you to make adjustments before the final scan.
- Once you are satisfied with the preview, click “Scan” to start the scanning process.
- Wait for the scan to complete. The scanned document will then be displayed within the Windows Fax and Scan application. From here, you can save the scanned file to your desired location on your computer.
Scanning Using Epson Printer Software
Many modern printers, including the Epson L5290, come with dedicated software designed to enhance user experience and provide advanced functionalities. This software suite often includes tools for scanning, offering a more feature-rich alternative to the basic Windows scanning tool. Epson’s software typically provides a range of features such as:
- Optical Character Recognition (OCR): This feature allows you to convert scanned images of text into editable text documents.
- Scan to Email: Directly email scanned documents as attachments, streamlining your workflow.
- Versatile File Format Options: Save scans in various formats, including PDF, TIFF, JPEG, and XPS, catering to different needs and compatibility requirements.
- Multi-page Scanning and Merging: Scan multiple pages and combine them into a single file, ideal for documents with several pages.
Scanning with the Epson Scan Utility for L5290
To utilize the dedicated Epson software for scanning with your L5290 printer, you will typically use the “Epson Scan” utility. This software is specifically designed for Epson scanners and printers and offers different modes to suit various scanning needs. Here’s how to use the Epson Scan utility:
- First, prepare your document for scanning. Place the document face-down on the scanner glass of your Epson L5290 printer, aligning it with the indicated marks.
- Ensure your Epson L5290 printer is connected to your computer, either via USB or network, and is powered on.
- Install the Epson Scan software. If you haven’t already, you can usually download the software from the official Epson support website or install it from the driver CD that came with your printer.
- Launch the “Epson Scan” application on your computer. You can typically find it in your applications or programs menu under “Epson” or by searching for “Epson Scan”.
- Epson Scan typically offers different scanning modes. Common modes include:
- Full Auto Mode: This is the simplest mode, automatically detecting document type and applying default settings for a quick scan.
- Home Mode: Offers a balance of automation and user control, allowing you to adjust basic settings.
- Office Mode: Optimized for office documents, providing settings for text clarity and efficient file sizes.
- Professional Mode: Provides the most control over scanning settings, allowing for detailed adjustments of image quality, resolution, color correction, and more. This mode is recommended for photos or documents where color accuracy and detail are critical.
- Select the appropriate mode based on your scanning needs. For general document scanning, “Home Mode” or “Office Mode” are often suitable. For photographs or high-quality images, “Professional Mode” is recommended.
- If you choose a mode other than “Full Auto Mode,” you will likely have options to preview your scan and adjust settings before the final scan. It’s advisable to use the preview feature to ensure the scan area and settings are to your liking. Adjust settings like resolution (DPI) and document type as needed.
- Click the “Scan” button to initiate the scanning process.
- Once the scan is complete, you will be prompted to save your scanned document. Choose your desired file format (like PDF or JPEG), file name, and save location on your computer.
For sensitive documents, Epson Scan software may also offer security features like password protection during the saving process, allowing you to add an extra layer of security to your scanned files.
Scanning documents with your Epson L5290 printer is a straightforward process, whether you choose to use the built-in Windows features or the dedicated Epson Scan utility. By following these steps, you can efficiently digitize your documents and streamline your digital workflow. Explore the features of your Epson L5290 to maximize its scanning capabilities and simplify your document management tasks.